Showing posts with label Embroidery. Show all posts

Monday, June 2, 2014

Perle Club : Member Perks

Happy Monday!

Have you signed up for our Perle Club yet?  We start shipments in this 6-month series in July and I am thrilled to share a little about the first of two exclusive project club members will receive.


Jennie and Clara at Clover & Violet design such cute embroidery projects and have offered to share the pattern for this cutie pin cushion with our club members!

Photo used with permission from Clover & Violet.

So cute right?!  You can read a little more about the original pin cushion here.  Club members will receive a special packet of fabric with their third shipment as well as the pattern for this project.

What are you waiting for?  Check out the club details and reserve your spot today!

Happy Sewing! :-)

Sunday, July 7, 2013

Tutorial : Hand Quilted Journal Cover

Hi everyone!

I was recently asked to participate in a hand made series over at Clover & Violet, so I put together a tutorial for hand quilting a sketch book cover.


You can read more about the hand quilting process here at Clover & Violet.

To make the cover, I modified the Swatch Book Cover Pattern from Michelle Patterns to fit the size of a standard composition book cover.  Since I followed her directions for construction, I don't want to share them here as a "tutorial" but will give you the measurements and modifications I made to create my book cover.

Modifications to Michelle Patterns Swatch Book Cover Pattern

  • I chose to omit the flap closure for this particular project. 
  • I used a 1/4" seam to baste the lining and flap pockets together. 
  • I used a 1/2" seam when I attached the front to the lining/pockets and left a 3" opening along the bottom instead of one of the sides.
  • I used a 1/8" seam to topstitch around the entire piece to finish. 
  • I used interfacing on the Crossweave (top and pockets) as well as on the lining, but didn't clip the corners before fusing (although I would next time to avoid some bulk).  Since I had quilted my top panel to flannel, I omitted the additional layer of sew-in interfacing called for in the pattern.
  • Measurements:  Top and lining measurements are 11.5" x 16.75" presew.  Pockets were cut 10" x 11.5" (fold along long edge for a 5" x 11.5" folded flaps). 
The pattern is well-written and easy to follow and includes instructions and pattern pieces for two sizes of Moleskin Cahier notebooks.  


To learn more about how I quilted the Moda Crossweave with Perle cotton check out my tutorial at Clover & Violet


For this project, I used Moda Crossweave in Natural, a Honey Honey by Kate Spain print for the lining, and Perle in Medium Sea Green and Light Violet.

If you're interested, my sample is available for sale here

Thanks for stopping by today!

Happy Sewing!  :-) 

Saturday, October 6, 2012

Customer Spotlight :: Wendy

Happy Saturday!

Today I wanted to share a project that one of our customers, Wendy of Caribousmom, recently completed. We love it when our customers email us with pictures of finished projects and we're excited to share Wendy's Garden Steps quilt with you.


Didn't it turn out just beautiful!?  You can read more about it from Wendy here.

Wendy used the Garden Steps Quilt Kit featuring Good Fortune by Kate Spain as well as the Garden Steps Perle thread kit to complete this Quilt Along project from Jennie & Clara at Clover & Violet.

Thanks so much for sharing your project with us, Wendy!

If you have a project you'd like to share with us, please email us!

Happy Sewing!  :-)

Monday, July 30, 2012

Design Challenge :: Bedside Trio


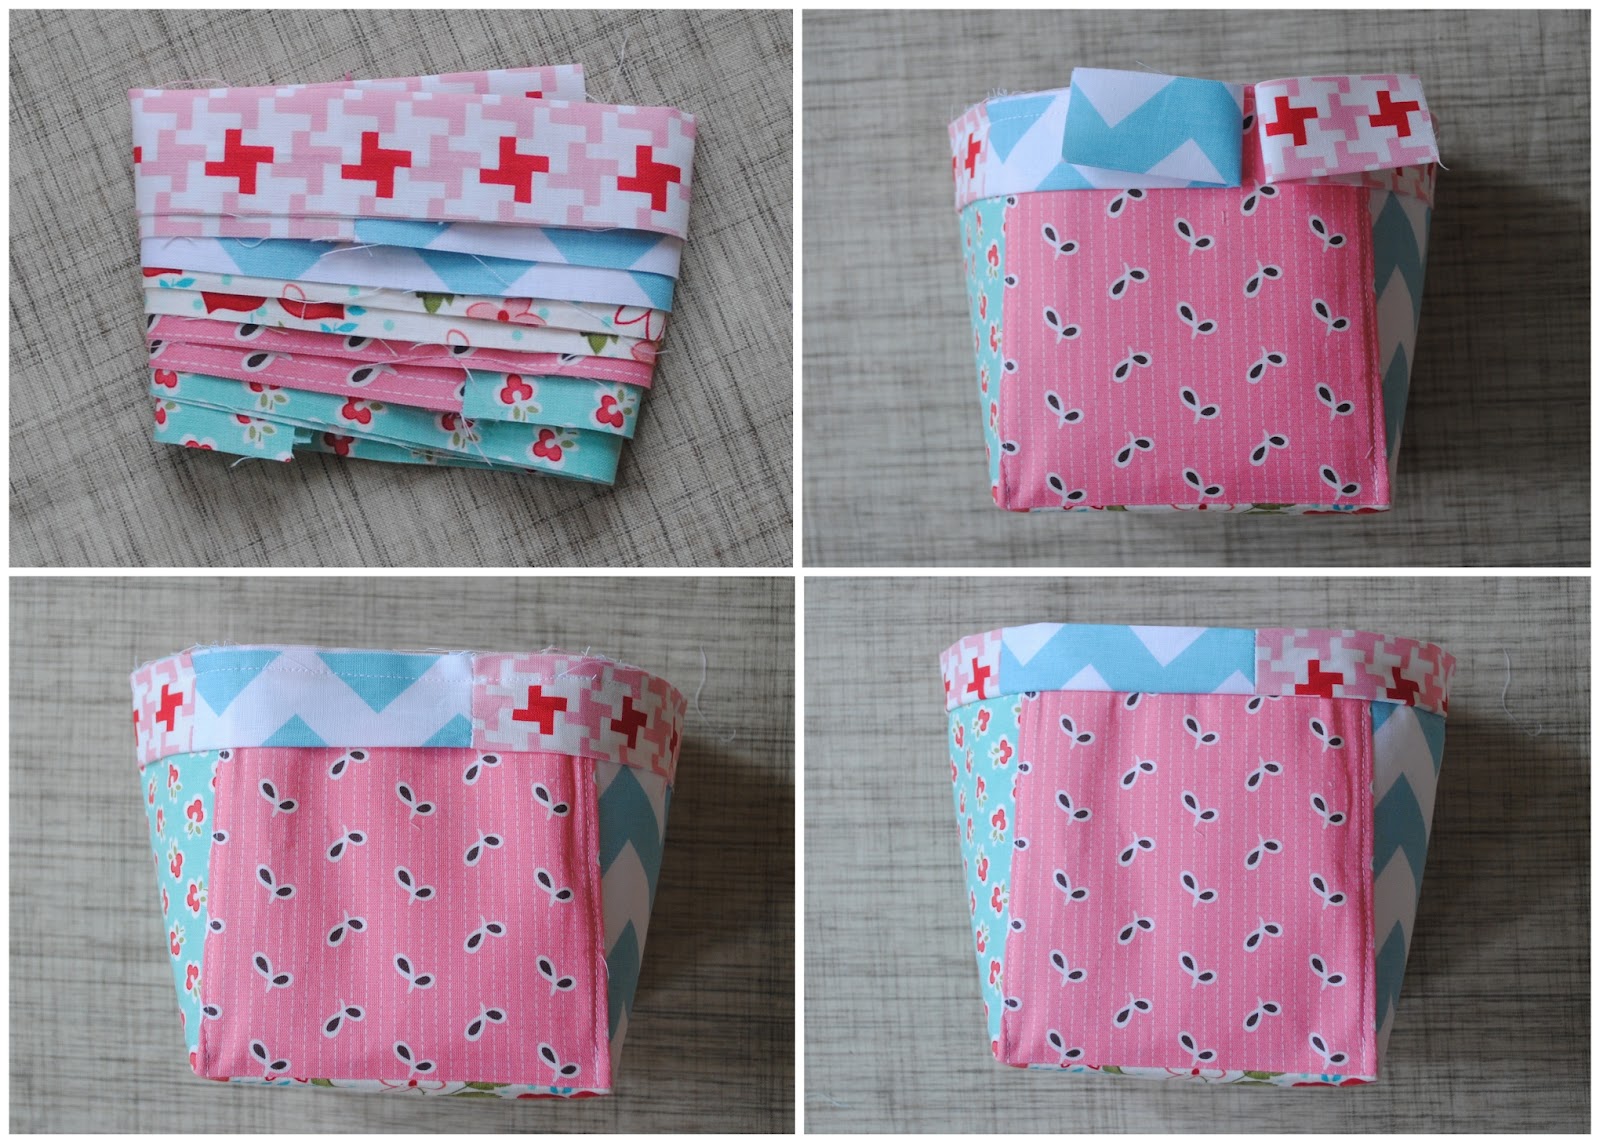
Hi everyone!  I'm really excited to be sharing these projects as part of the Sew Lux Design Challenge.  When Chrissy first asked me if I'd be interested in making something, I immediately thought it must include Vintage Modern and embroidery.  A short time later, I was out shopping and looking for more canvas baskets for the kid's dressers, only to find the ones I liked were no longer available.  It seemed like the perfect opportunity to make my own.

I then thought that a smaller, nesting basket would be nice, but enough smaller that it doubles as a divider instead of just a smaller basket.  I chose a couple favorite Vintage Modern prints, added a few others I loved, picked out some coordinating threads, and made a fun bedside set.

Supplies:
For the large basket, from each printed fat quarter, cut 2 - 3 1/2" x 18" strips.  Cut the strips into 10 - 3 1/2" squares from each fabric.  From the porcelain fat quarter cut 2 - 7" x 18" strips.  From each strip cut one 6 1/2" x 9 1/2" rectangle {bottom of large basket} and 4 - 3 1/2" squares.

Note: the outside of the baskets are sewing with 1/4" seam allowance, for the inside to fit and not be bunched up {like my large basket!}, sew the bottom seams and the side construction seams with a 3/8" seam allowance.

Large Basket

From the 3 1/2" squares piece 4 - 5 squares x 2 squares pieces for the basket - two for the body and two for the lining {note, I used three porcelain pieces on the basket body, none on the lining}.


Use the two outside panels and one porcelain 6 1/2" x 9 1/2" rectangle and sew together to form an "I" shape:


Then, place the outside of basket on batting and trim batting to fit {if using fusbile batting, follow manufacturer's directions and fuse in place}, then quilt as desired {I quilted in the ditch of all the seams and then quilted a large "X" across all the print square.


Embroider the squares as shown.  If you're new to embroidery, you can find my Embroidery 101 tutorials here.


Sew the short patchwork side seams, press open {I also top stitched my side seams to keep the fabrics in place}.  Please note: if using Fusible Thermolam - only press the fabric or use a press cloth, it will melt if touched with the iron, I know this from experience!  Turn your basket right side out and press all the corners.

Make the lining using the same method but, instead of batting, use the heavy interfacing.  I omitted the quilting on my lining.  Place the lining inside the basket and top stitch 1/8" from the raw edge.  Set aside.

Small Basket
 

To make the small basket, cut one 5 " x 18" strip from each printed fat quarter, from each strip cut 2 - 5" squares.  Assemble the basket in the same manner as the large basket, using heavy interfacing for both the outside and the lining.  Use a 1/4" seam allowance for the outer basket, and 3/8" for the inner.  Place the inner basket inside the outer, wrong sides together, and top stitch them together.

Bind the Baskets

Then, from each printed fat quarter, cut one 2 1/2" x 18" strip, cut one extra 2 1/2" strip {for added interest, I also cut one of the remaining 5" wide pieces into two 2 1/2" strips and sewed one of them to my binding strip}.  Sew the strips together to make one long length of scrappy binding.  Fold the binding in half, wrong sides together, and press.


Place binding, fold down, around the outside edge of basket.  Stitch 1/4" from raw edge, leaving 4" of unstitched binding.  Join seam and finish stitching the binding around the basket.  Fold over raw edge.


Machine stitch binding in place {I like to use pins when machine stitching to make sure the bindings are nice and even}, and you're finished!  Bind the larger basket the same way, using the scrappy binding.

Embroidered Mini Quilt

And, since every dresser or nightstand needs a mini quilt, I used the 16 of remaining 3 1/2" squares to do a matching embroidery quilt.  After piecing the squares in the same manner as the large basket, I fused a square of batting to the back and then stitched my embroideries in the same manner as the large basket.


I used the remaining 5" pieces to do a scrappy backing, and the two leftover 3 1/2" squares to make corner pockets, so I can hang it on the wall if I chose!


Thanks so much for having me today, and I hope you enjoy making this as much as I have, it would make a perfect baby gift too {hint, hint!}.  And the fat quarter bundles and perle cotton samplers are on a special sale until August 4th, so get one while they're available.  Enjoy!

Tuesday, May 22, 2012

Summertime Adventures: Button Hoop Tutorial


Hi everyone!  I am really excited to be participating in Clover & Violet's Summertime Adventures Blog Hop.  If you haven't checked out the series, there are lots of great tutorials.  Just click on the button to see all the posts. There are even some prizes for sharing your own projects.

This week the theme is sewing projects "on the go."  When I think of projects I can take along with me, I think of things that require few supplies and that can be hand stitched.  So, for today I have prepared a quick and easy embroidery project - perfect for showing off some favorite buttons.  Are you ready?


Supplies Needed: 

  • 7" embroidery hoop 
  • 9 assorted buttons (mine are about 3/4-1" in diameter) 
  • Embroidery thread (I used Finca Perle Drab Green Brown)
  • 12" x 12" White fabric (I used Bella White Bleached
  • 12" x 12" white fusible interfacing
  • Marking pen (such as FriXion erasable pen)
  • Basic sewing supplies - clear ruler, needle & scissors
  • Card stock & adhesive
Note:  I do have a few kits available here with all the fabric, interfacing, thread and buttons you'll need to make this project.  Hoop, pen, card stock, adhesive, needle, ruler, and scissors are not included in the kit. 

Step 1: Fuse Interfacing to your fabric.  Follow the directions from the manufacturer to fuse the interfacing to your white square of fabric. 

Step 2: Mark the center by folding the fabric in half and then in half again.  Finger pressing will do .... don't crease too hard - just enough to know where the center is. 

Step 3: Mark your grid.  Start by marking the center lines that you just made. 

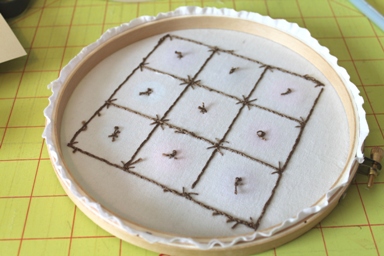
Then use a clear ruler to mark off a grid of 1.5" squares.  Start by marking lines 0.75 inches away from the center lines.  Then 1.5" away from those lines.  When finished it should look like this ... 

Step 4: Hoop it up!  Center the design in the hoop.

Step 5:  Start stitching.  Use a basic back stitch (directions here) for the grid and the accents at the corners. 

Keep going ... you're doing great! 

At the intersections of the grid, make a french knot.  (Directions here.)


Step 6: Unhoop and iron your work. 


Step 7:  Rehoop and stitch on your buttons. 

Step 8: Trace your hoop onto a piece of card stock.  Cut out the circle. 

Step 9:  Trim the excess fabric away.  (Note: next time I will trim a little more generously!)

Step 10: Adhere your card stock to the back of your hoop. I used a sticky scrapbooking tape.  Of course, you could just glue the excess fabric to the inside of the hoop.  

Step 11:  Admire your work!  :-) 


I hope you enjoyed this tutorial!  This was my first hoop embroidery project and if I can do it, you can too!  :-)  I also think it would be a super cute little pillow or you could frame it in a picture frame too.  If you have any questions, please email me or leave them in the comments.  If you make a hoop, I'd love to see it - please link it up in the comments section!

Happy Sewing!  :-) 

Wednesday, February 22, 2012

Garden Steps Stitch & Quilt Along

Happy Wednesday!
We are so excited to partner with Clover & Violet again on another Stitch & Quilt Along.  Jennie and Clara are so fun to work with and not only do they come up with beautiful projects but they show you all the step-by-step instructions for assembling your blocks and stitching the embroidery designs. 


Garden Steps is going to be another great project!  And the Good Fortune collection by Kate Spain that Jennie selected to work with is beautiful.  Look at this kit of fat quarters ...


And, of course, we have a selection of Perle threads to add to your collection for this project.  Ten yards of ten different colors!  Both cards (the warm and cool palettes) are included in the kit.


Stop by and see Jennie and Clara today ... they'll be talking about the project in more detail and the supplies you'll need.  They also has a coupon code to share with you for the kit, perle thread, and coordinating yardage!

Happy Sewing! :-)

Sunday, July 31, 2011

Practicing

Hi there ...

I've been practicing my embroidery skills this weekend while doing a bit of traveling.  I figured I couldn't go five days without making something and didn't want to lug my machine and assorted accessories.  I saw this picture several weeks ago on Flickr and loved it and thought it would be a good project to bring along for the ride.  I decided to try the original design first (you can find it here).

Well, so far it is going pretty well. (I think ... this is my first embroidery project!) I wish I had brought along a smaller hoop to work with.  I'm using the dark grey perle from the Little Apples Perle Sampler kit on Bella White.  It's not as stark as black but will contrast well with whatever buttons end up on this.  I am also doing mine a little smaller than her original size.  (Mostly because I forgot to resize the picture! haha)  I definitely need to work on my circles but I'm enjoying the process.  Thanks to Clover &Violet for all the great stitch tutorials! :-)

That's all for now y'all!  Hope you've been having a great weekend.  :-)

Happy Sewing!