Hi everyone! I am really excited to be participating in
Clover & Violet's Summertime Adventures Blog Hop. If you haven't checked out the series, there are lots of great tutorials. Just click on the button to see all the posts. There are even some prizes for sharing your own projects.
This week the theme is sewing projects "on the go." When I think of projects I can take along with me, I think of things that require few supplies and that can be hand stitched. So, for today I have prepared a quick and easy embroidery project - perfect for showing off some favorite buttons. Are you ready?
Supplies Needed:
Note: I do have a few kits available here with all the fabric, interfacing, thread and buttons you'll need to make this project. Hoop, pen, card stock, adhesive, needle, ruler, and scissors are not included in the kit.
Step 1: Fuse Interfacing to your fabric. Follow the directions from the manufacturer to fuse the interfacing to your white square of fabric.
Step 2: Mark the center by folding the fabric in half and then in half again. Finger pressing will do .... don't crease too hard - just enough to know where the center is.
Step 3: Mark your grid. Start by marking the center lines that you just made.
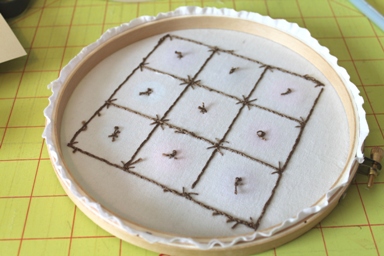
Then use a clear ruler to mark off a grid of 1.5" squares. Start by marking lines 0.75 inches away from the center lines. Then 1.5" away from those lines. When finished it should look like this ...
Step 4: Hoop it up! Center the design in the hoop.
Step 5: Start stitching. Use a basic back stitch (
directions here) for the grid and the accents at the corners.
Keep going ... you're doing great!
Step 6: Unhoop and iron your work.
Step 7: Rehoop and stitch on your buttons.
Step 8: Trace your hoop onto a piece of card stock. Cut out the circle.
Step 9: Trim the excess fabric away. (Note: next time I will trim a little more generously!)
Step 10: Adhere your card stock to the back of your hoop. I used a sticky scrapbooking tape. Of course, you could just glue the excess fabric to the inside of the hoop.
Step 11: Admire your work! :-)
I hope you enjoyed this tutorial! This was my first hoop embroidery project and if I can do it, you can too! :-) I also think it would be a super cute little pillow or you could frame it in a picture frame too. If you have any questions, please email me or leave them in the comments. If you make a hoop, I'd love to see it - please link it up in the comments section!
Happy Sewing! :-)