Showing posts with label baby quilt. Show all posts

Tuesday, August 6, 2013

In Progress : 16 Patch

What's stitchin' y'all?

I managed spend quite a bit of time stitching this past weekend and I must say it was pretty glorious to spend several hours stitching away at my leisure.

I got to hang out Saturday morning with my friend Sarah of Stitching & Bacon and we nerded out about fabric and quilts over coffee.  Super fun to talk fabric with her as many of my "real life friends" aren't quilters. She was telling me about her 16-patches and how fun and fast they were, so the decision was made!  Of course, I had to make one too.

Then when the mail came that afternoon and I saw the new HGTV magazine, I was inspired by the color combo on the front.


I had intended to go with pink, aqua, red and B&W low volume, but ended up nixing the red.


What do you think?  I whipped out 12 blocks in an evening and pieced the 30 x 40 baby quilt together rather quickly.

I did start quilting this on Sunday, but due to a tension issue, have since picked the quilting out.  Ugh.  I really think a different backing would be better too, so I have a feeling I will be unbasting and rebasting at some point this week.  I'll keep you posted!

Happy Sewing!  :-)

Friday, January 4, 2013

Design Challenge Tutorial : Quick Triangles Baby Quilt


This post is part of the Design Challenge Series here at Sew Lux Fabric.
See all the previous blogger interviews and tutorials here.

Quick Triangles Baby Quilt
 
Hello, I'm Lindsay, and I blog at Lindsay Sews and Craft Buds. I'm excited to share with you how to make this Quick Triangles Baby Quilt. Specifically, I'd like to share how you can make half square triangles eight at a time! I've made half square triangles 1, 2, or 4 at a time, but never 8 at once. It's pretty amazing, and with the large and speedy quilt blocks, you can totally make this quilt top in an evening!

Materials:
- 6 fat quarters
- 5/8 yard border fabric
- 1 1/2 yards backing fabric
- 3/8 yard binding fabric
- Crib size (45" x 60") quilt batting

Finished Quilt Size: 38" x 53"


This is my curated bundle from Sew Lux fabrics, which includes grays, yellow and aqua fabrics in modern prints by various designers. I wanted to challenge myself to make an entire quilt (crib size!) from these six fat quarters, so I went with a familiar quilt block, but made it as large as possible. 


First, break your fat quarters into three sets of two, pairing up prints that coordinate well with each other. I chose to pair each of my gray/white prints with a color.


Open up two of your fat quarters, stack them, and trim to an 18" x 18" square. We are going to use these to make half-square triangles, 8 at a time.


Re-stack your 18" x 18" squares with right sides facing. Use your ruler and a pen to mark a diagonal line from corner to corner on one wrong side. Pin squares together at the corners to hold the fabric in place while you sew.


Stitch a line 1/4" from the edge of one marked line, on both the left and right sides of the line. Repeat with the other marked line.


After you've stitched the four long lines, resist the urge to cut along the marked lines just yet. Instead, use the stitch lines to locate the center of the block. With your ruler and rotary cutter, cut both a vertical line and a horizontal line directly down the center of the fabric.


Take each of your four sections, and now your may cut down the center of your stitches, along the line you marked earlier. You should have 8 half square triangle units.


Open up your half square triangles and press the seams open.


 Use a square ruler to trim each block to 8" x 8". Make sure to line up the diagonal line of the ruler with your half square triangle before you cut.


Here are the eight 8" half square triangle blocks from just two fat quarters. Repeat with the other fat quarters, and you should have 24 total blocks.


Arrange your blocks as desired. There are many ways to arrange half square triangle blocks in a quilt. You can make chevrons, diamonds, or just mix them all up. I arranged the blocks in a 4x6 grid and kept them in a set order, with the colors pointing to the upper-left and the grays pointing to the lower-right.


With right sides facing, pin together the blocks in each row and stitch. Press the seams open.


Next, join together the rows with right sides facing, and pin at each seam. Stitch together the rows and press the seams open.


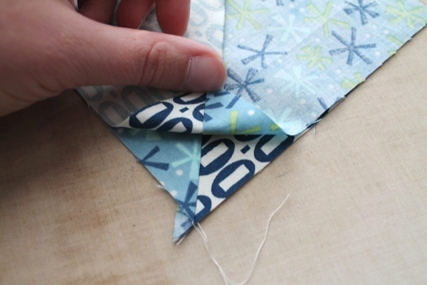
To make the border, cut your border fabric 5" x the width of fabric, for 4 strips total. Starting in one corner, attach a border strip to the top, then trim the excess. Repeat with the bottom. Stitch the ends of these strips to the other to border strips you've cut for the sides, to lengthen them. Press the seams open, then stitch the left and right border strips to the quilt and trim.

Quick Triangles Baby Quilt

Press the seams open. Baste, quilt and bind as desired. After quilting and before binding, I trimmed the borders to 4 1/4" to keep them even all the way around.


This pattern is very beginner-friendly, and I'd recommend it for showing off strong prints. I hope you've enjoyed this tutorial, and if you like this fabric combo, you can purchase a Design Challenge bundle kit at Sew Lux!

Sunday, October 28, 2012

Weekend Sewing

Been doing a little sewing this weekend ... not too much since we traveled to a wedding out of town yesterday.  I have several friends expecting little ones soon, so I am on a mad dash to finish up some little quilts.


Fortunately, Jennie's Car Seat Quilt pattern is pretty quick to make.  Started a Bungle Jungle version ....


Finished the top today and then got all the pieces cut to a Vintage Modern version as well.  Hope to baste tomorrow.

What did you work on this weekend?

Happy Sewing!  :-)
Friday, August 31, 2012

Design Challenge :: Owl Baby Blankie


Welcome to the August Design Challenge post!

This month, I have a fun and super quick project for you.  All you need is one fat quarter bundle (6 prints) and some batting (about 20 x 26").

These are the prints I am using for this project.  You can pick up a bundle here (on sale through 9/3/12).

I started with a sketch of the design.  This was helpful and I have linked up a cutting diagram here since you'll be getting the top, binding, and backing all from just the 6 fat quarters.  :-)

Let's start with the hourglass blocks.  With the two blue prints, you will cut a strip 6" x 22".  Sub cut this strip to get two 6" blocks.  The rest of the strip is scrap.  Hold the larger pieces aside for the backing later.

Place the two squares right sides together and cut along the diagonal. Use a 1/4 seam and stitch the triangles together. Press toward the star print.

Then place the two squares right sides together, opposite fabrics together.  The seams should nest together nicely.

Pin in place draw a diagonal line in the opposite direction.

You will stitch 1/4" on both sides of the line. Then cut along the line.

Press open and repeat with the other two squares so you have four hourglass blocks.

Then place the block on your cutting mat - if you have diagonal lines, it will be helpful to use them.

You will trim 2.25" from the center of the block - so that you end up with 4.5" square blocks.

Cut the rest of your pieces.  (Refer to cutting diagram.)

There are two main blocks that you need to make ...

For the block on the left, piece the two squares and then the orange strip to the joined squares.  For the block on the right, join the large square to the chevron strip. You need 4 of the blocks on the left and 5 of the blocks on the right. They will look like this...

At this point, blocks should measure 6.5" x 8.5".  Join 3 blocks to create a row.

Then the three rows to finish the top.

Cute right?  (I love it!  I am thinking about making a bigger one for me!)

Now, grab the remaining pieces of your FQs so we can cut strips for the backing.  I used a little bit of all the prints - reserving ALL the orange for the binding.

Join all the strips together to create the backing.  I pressed seams all in one direction, but you may also wish to press them open. The backing should measure approx 22" wide x 28" tall.

Layer the backing right side down, batting, and then the top right side up.

Use the seams of the rows on the front with a strip on the back to make sure your backing is straight.  This way your stripes on the back won't be wonky!  :)

Pin baste and quilt as desired.

Trim excess batting and backing.

For the binding, cut the remaining piece of your FQ into 2.5" x 22" strips.  Join the strips together at the ends.

Then fold in half to creating the binding.

Attaching binding.  (I forgot to take pictures of this process.  But I have a tutorial here.)

And you're all finished!  Quilt measures 18" x 24" - perfect for a car seat or stroller.

The striped backing kind of makes it a two-for-one!

I hope you enjoyed my tutorial!  If you have any questions, please ask in the comments or send me an email.  And if you make one of these little quilts, please share the link or send a picture - I'd love to see it!  :-)

Happy sewing!  :-)