Showing posts with label Quilt Along. Show all posts

Saturday, March 7, 2015

Smitten Quilt Along : Large Block Two

Hey everyone!  I hope you are ready for more y-seams!  :-)  The Large Block Two comes together similar to last month's.  But with a few less pieces, its pretty fast ... especially since you've got the y-seam down now, right?! ;-) 

For more details on the Smitten Quilt Along, visit this post here for dates and supplies, etc.  If you haven't purchased templates, go ahead and make your's using the pattern and template plastic or other material of your choice.  (Be sure to add the seam allowance if making your own templates.)

Note:  I glue baste my pieces.  I didn't take pictures of this for this month, as I shared them in the post about last month's blocks

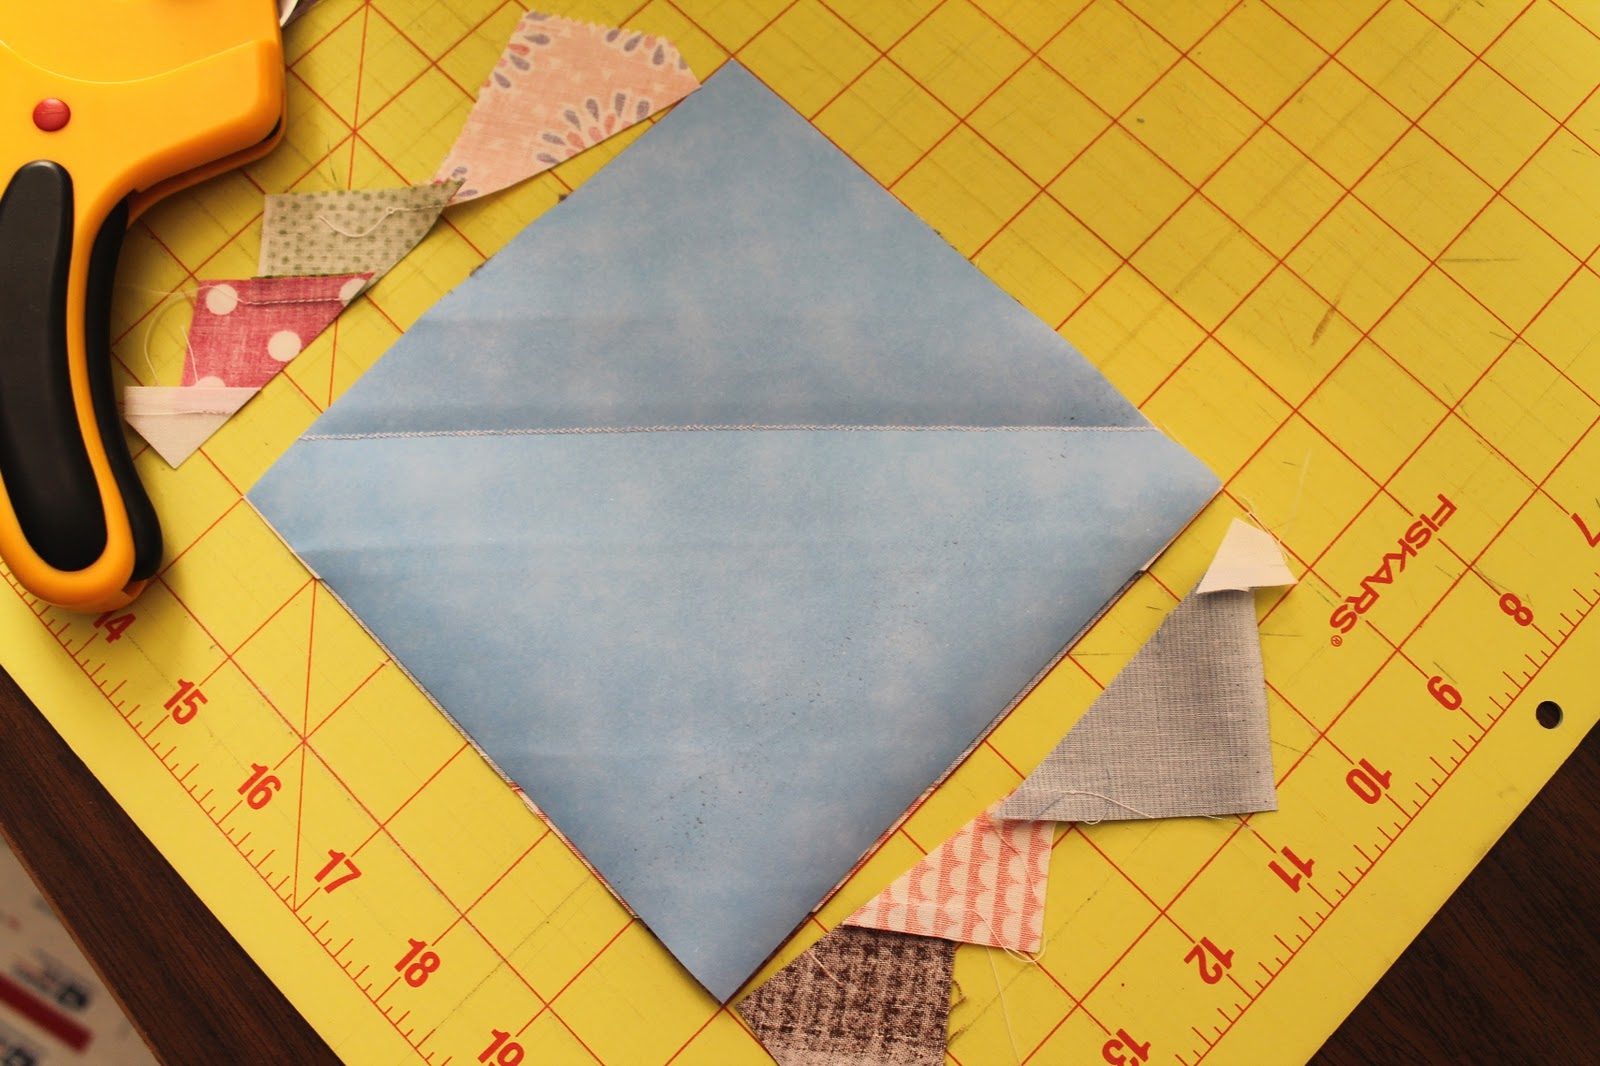
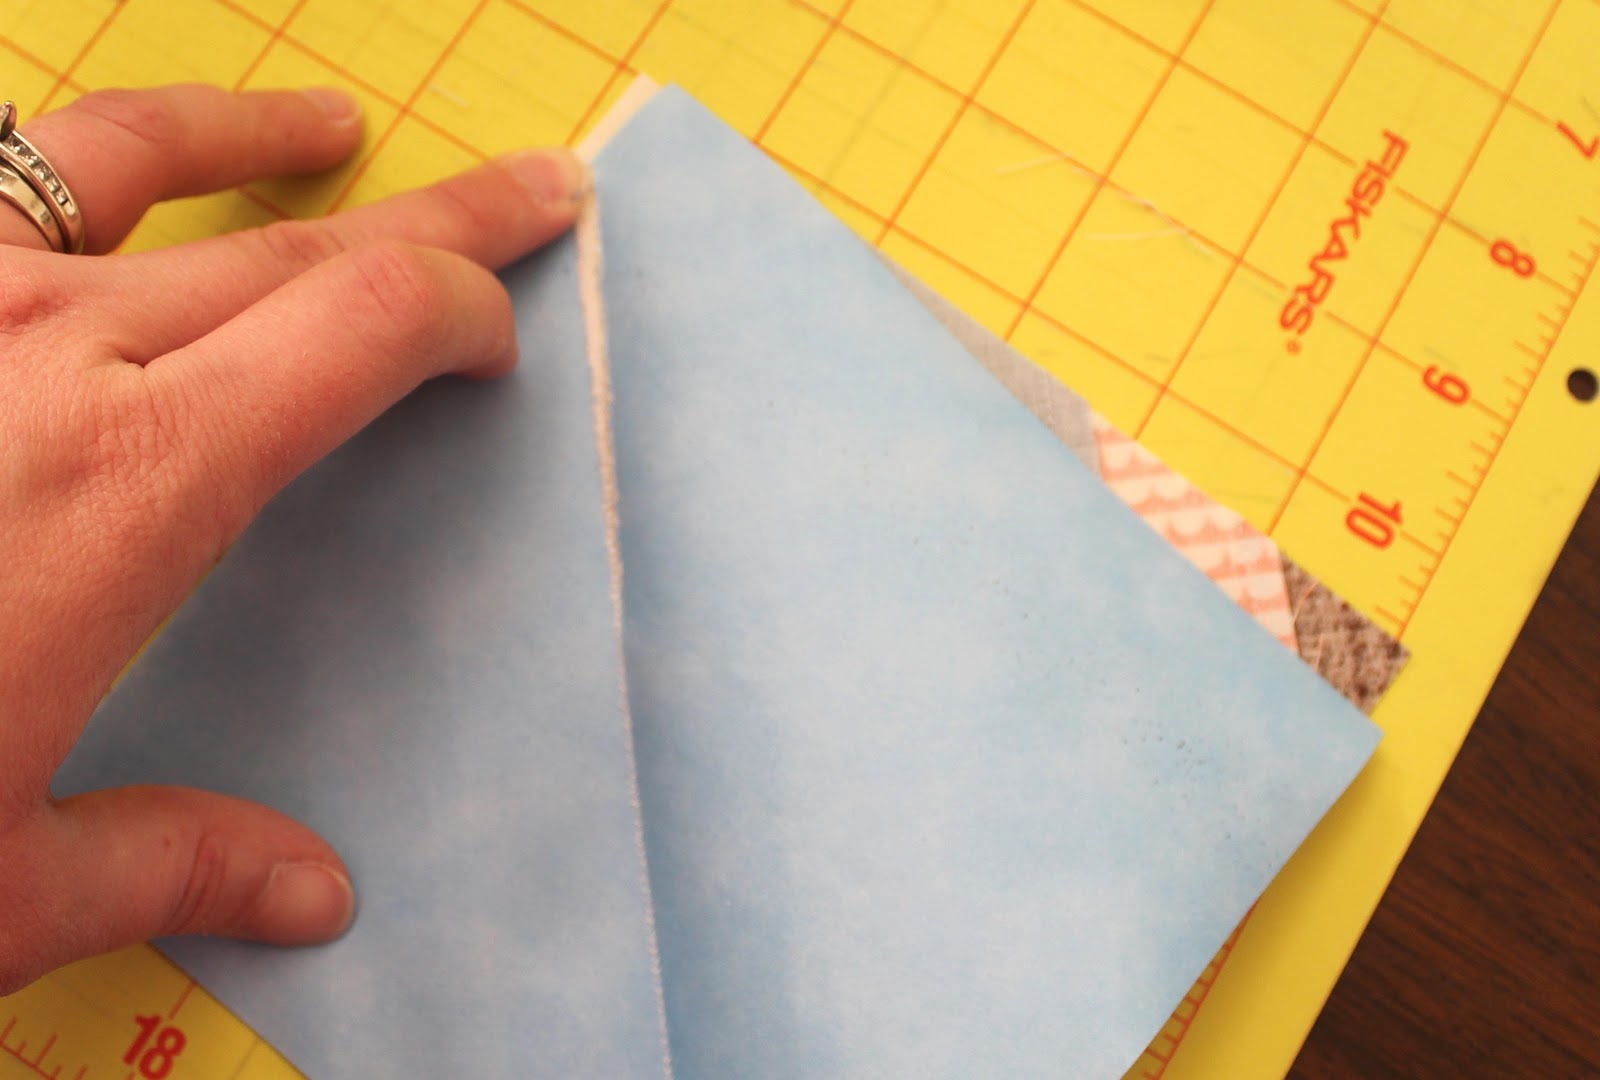
Don't forget to mark your pieces!  It's all about connecting the dots!  Mark the wrong side of your fabric pieces with dots where the 1/4" seams would meet.  (The acrylic templates have holes, making this super easy!) Alternatively, you could use your ruler and pen to draw lines along the seam allowances to mark your start and stop points.


We'll use these dots as our start and stop points for sewing. Sew a 1/4" seam and always backstitch to secure, but don't sew past the dots, unless we are sewing to the edge.  (You'd sew to the edge when the seam is not part of a Y-seam intersection... this will hopefully make more sense in pictures below.)


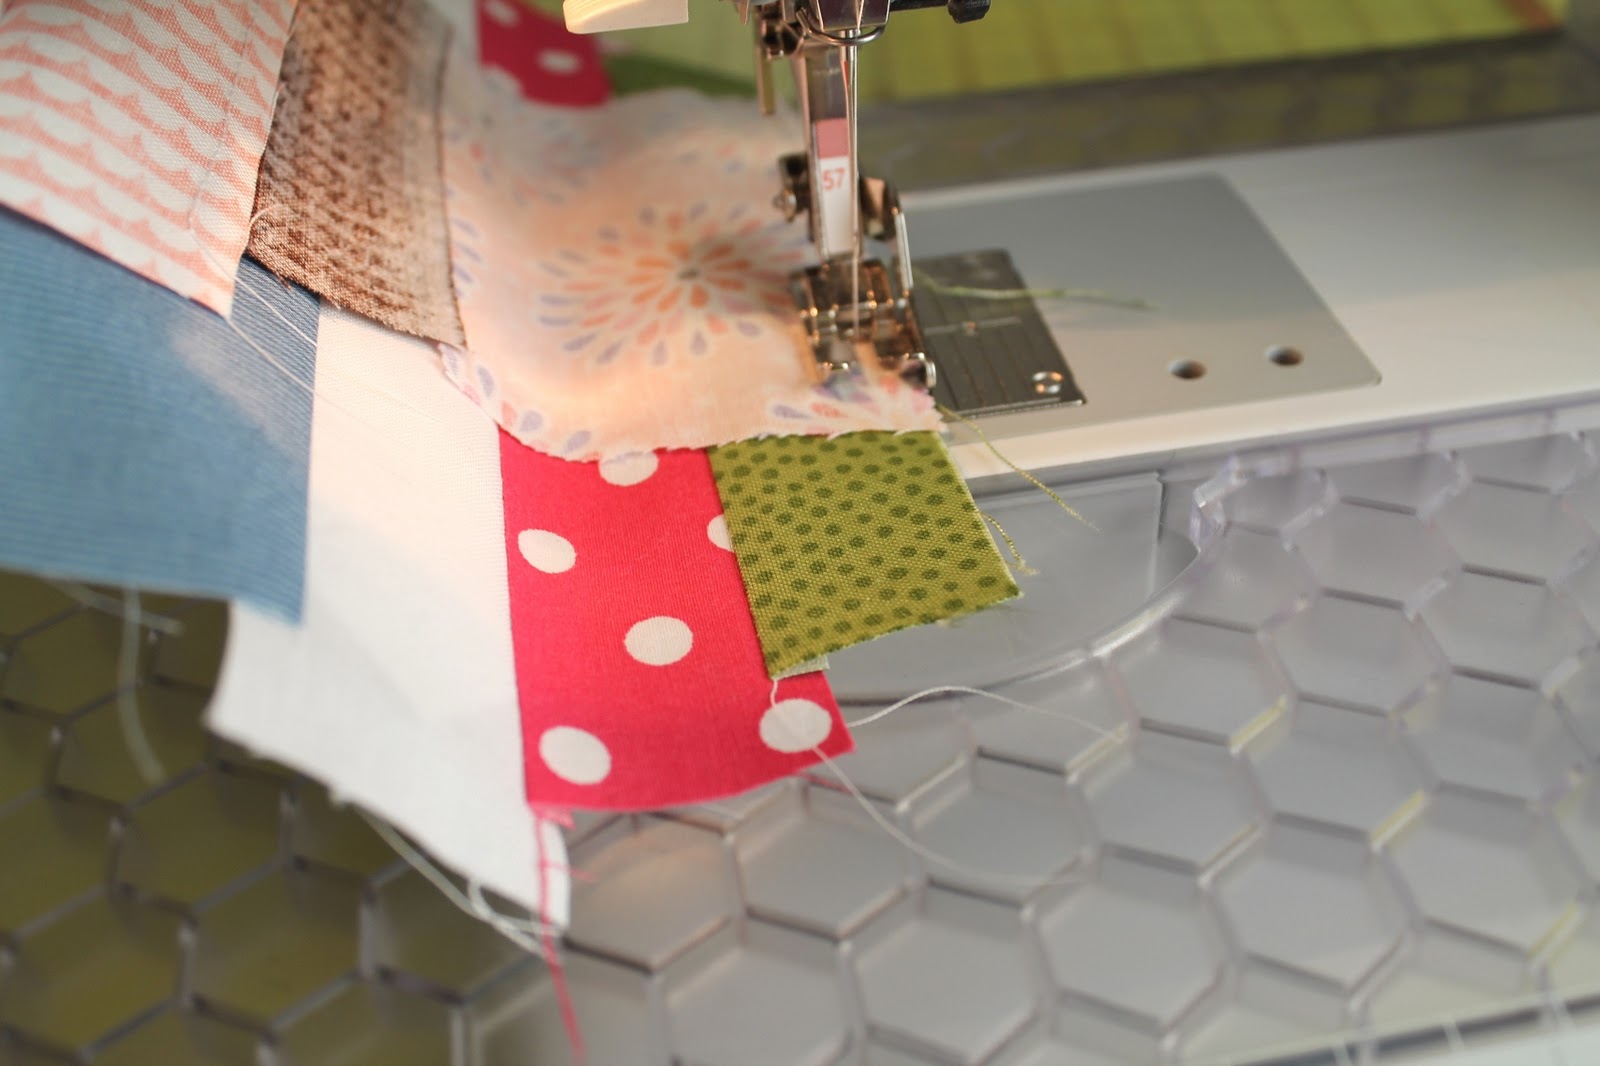
Start by sewing the triangles to six hexagons.  Go ahead and chain piece these - these seams are not part of a Y-seam, so they can be sewn from edge to edge. 


Press toward the triangles once sewn. 

Next, we'll join together the hexagon-triangle units into two sets of three units.  You'll sew dot-to-dot to join these units. 


Then its time to add a diamond in each exterior opening, which complete the overall hexagon shape of the finished block. You'll be sewing from the inside dot (at the Y-seam) all the way to the exterior edge.  


Add in a diamond on the opposite side to finish the half unit.  Repeat with the other trio of hexagon-triangle units.


Join each half to the center hexagon just like we did with Large Block One.  We're sewing dot to dot to join to the center hexagon.


You'll join the sides of the two halves (again - just like last month with Large Block One), sewing dot to dot. Then sew in the remaining two side diamonds just as you did before - sewing from the inner dot to the exterior edge. 

I pressed all my seams in the same direction - refer to the photo below. 


And that's it!  You're done!  Yippee!

Now plan and sew four more ... you need 5 completed Large Block Twos.

I hope these photos were helpful to you...  I can't wait to make a few more myself and to see your's too! Don't forget to use #smittenquilt and #smittenquiltqal on Instagram. :-)

If you have questions, leave a comment, email me or tag me on IG!

Happy Sewing!  :)

Sunday, January 19, 2014

Lazy Sunday Quilt Along

Hey there friends!

I am really excited to announce a brand new Quilt Along today.  My friend Lee of May Chappell has a great layer cake pattern called Lazy Sunday.  I know this to be easy and fast to piece as I watched her piece two in one weekend at a sewing retreat!  I've been planning to make one for a few months now and thought it would be fun to make one with other stitchy peeps ... so here we go with a quilt along!  :-)

And since you can't have a quilt along without prizes, let's get right down to the details:

STITCH IT UP:
Piece a Lazy Sunday quilt - you'll need the pattern, a layer cake, and coordinating backing & binding
(This pattern can also be made with FQs.)

SHOW IT OFF:
I'll be sharing my progress here on the blog AND on Instagram.  Here's my plan:
1/26/14 - Prepping all my supplies & getting ready to piece by blocks
2/2/14 - Piece the top
2/9/14 - Quilt it up
2/16/14 - Finish & bind

PRIZES: 
We'll have a linky available 2/16/14 - 3/9/14 for you to link up your finished Lazy Sunday quilt.   We'll choose a random winner for a $30 gift certificate to our shop.  Winner will be announced 3/12/14.

Are you on Instagram?  Tag your progress photos with #lazysundayqal and #isewwithsewlux and you could win!  We'll choose a weekly winner to win a PDF of their choice from May Chappell patterns - a winner will be chosen and announced here on the blog and on Instagram on 1/26, 2/2, 2/9, and 2/16.

Need a layer cake or pattern?  We've got you covered!  Save 10% on both layer cakes and the Lazy Sunday pattern now through 1/26/14.


Are you in?  I hope so!

Happy Sewing!  :-)


Thursday, August 1, 2013

Holiday Hustle QAL : Piecing the Blocks

It's August 1st and that means its time to get this quilt under way!  I pieced the blocks in about an hour and I probably could have hustled to get it done faster.  Ready?

If you missed the first post detailing the fabric required for this quilt, check it out here.  For today, all you need is a charm pack and your machine.  That's it!


Step 1: Grab a charm pack!

I am using an Aspen Frost kit for my quilt.  We'll use all 42 5-inch squares.

Step 2:  Sort your charms by color. 

It's likely that your charm pack is already sorted by color.  So this is easy ... just lay them out so you can see them all.

Step 3:  Sort your charms into three sets of 14. 

To do this, you'll want to work by color.  Sort of like dealing playing cards.  Start with one color and divide into three stacks.  Repeat with each color so that you won't have all the reds on one side and the greens on the other.

Step 4: Arrange each set group of 14 into smaller sections. 

From each group of 14, you will need two sets of 2, one set of 4 and one set of 6.  You can see that I just shift-sorted them on my ironing board.  (This quilt is all about the hustle and I didn't feel like laying them out downstairs and then hauling them back up to sew!  But if you prefer to lay them all out on the floor or a design wall, go for it!)


Note that I am trying to mix up the colors and prints some across the whole quilt top.


This diagram might help you plan your placement.


TIP:  Once you have your placement figured out, its a great idea to snap a photo with your phone or camera. If you get confused while sewing later, you can then just check the photo to make sure you are sewing the right prints in the right order.

Steps 5 & 6:  Sew and label your blocks

Cut some scraps of paper and label as A-1, A-2, A-3, A-4, B-1, B-2, B-3, B-4, C-1, C-2, C-3, and C-4. Lay them with each corresponding group (refer to diagram above).  This way you'll be able to get them all in the right place later!  I just pinned my labels to the top left corner of each block set as I was sewing them together.

Start sewing your blocks together using a 1/4" seam.  Be careful of any directional prints that they all go in the same direction.  (You don't want Frosty or some trees upside down later!)

For sets of 2 squares, press in either direction.


For the 4 patch, you'll sew two pairs and then join the two rows.  Before joining, press rows in opposite directions so you can nest your seams.


Just butt the seams together, pin the intersection, and then sew.


Look how nice that turned out!  You can press the completed 4 patch in either direction.


For the 2x3 block, repeat the process.  Make 3 rows of pairs. Press in opposite directions, nest the seams, and sew the rows together.


Since we're hustling through this quilt, I chain pieced a lot of my blocks and then also double pinned my 2x6 to save a trip back to the ironing board.  (Refer to photo above.)

Step 7:  Check your layout and admire your work!


Now that you've sewn all your blocks together, take them where you can lay them out.  Using the diagram shown earlier in this post, lay them out in columns (A, B, & C) and make sure you like the arrangement.

Shuffle them around a little if you feel like you need to balance colors or prints.  Or just leave and love it!

That's all you need to do for this week!  Next week, we'll add sashing and borders.  The week after that we'll quilt and bind.  A few Christmas kits are still available - so join the fun why don't you?!

If you have any questions, please leave a comment or email me at sewlux (at) gmail (dot) com.

Happy Sewing!  :-)

Sunday, February 12, 2012

Scrap Attack Strings QAL - The First 8

Hi there!  Last week, I added a linky post for you to show & tell your Scrap Attack Strings QAL blocks!  Well, I figured I'd better show you my blocks too! :-)

Here are my first 8 blocks ...


I am really loving the scrappy-ness of this project.  And I like knowing that when I am all done this quilt will be like a walk down my sewing memory lane! Even while I was assembling blocks I was thinking about the people and the projects that these scraps came from. 

There is still time to enter the drawing for the first linky - all the details are here.  And if you're just now learning about the Scrap Attack Strings QAL or planning to start in, don't feel like you're late!  You are welcome to jump in any time!  :-)

Later this week I will share how I am storing my blocks for this project. Until then ...

Happy Sewing! :-)

Wednesday, February 8, 2012

Scrap Attack Strings QAL Show & Tell #1

Well, hello there!  About a month ago, I introduced a QAL to help us use up those pretty little bits we all have hiding in the scrap bin.  (Of course, you could make this quilt with yardage too!)


You can read more about it here and find a tutorial for the blocks here.  (Easy peasy!)  I will be posting a linky party once a month for a little show and tell of your blocks! Today's the first linky!  You'll have until 2/19/12 to share the blocks you've made so far ... or if you are just getting started, show me your scraps and share a link to the QAL project on your blog.  I'll select a random entry for a fun little surprise!

Happy Sewing! :-)

Sunday, January 15, 2012

Scrap Attack Strings - Paper Piecing (Updated)

Hey y'all!  Hope you've all been having a great weekend!  I have one more day off and I am thankful for the extended break.  :-)

Last week, when I posted the tutorial for the Scrap Attack Strings QAL block, some folks had some questions about what I am doing with the paper during the process of making the block.  So, I made another block and took photos of the step-by-step process.

Ok, so you'll need to cut a 6" square and mark it as shown in the first tutorial. Once you've sewn your center strip and first side strip together (through the paper), here's what you do ...

With the fabric facing down, fold the paper away from the where you will be adding the next strip.

It should look like this ...

Now flip the block back over so the fabric is facing up.

Pin a fabric strip to opposite side of the white center strip. (Note the paper is folded back and you're only pinning through the 2 layers of fabric.

And stitch the seam. Notice the paper is folded so it is away from the needle.

Now press the seam open.

Ok, let's flip the paper back the other way so we can keep adding strips.

Turn the block face up and pin a fabric strip.

Note:  the paper is still out of the way and you are pinning through just the 2 layers of fabric.

Stitch and press.  And add another strip. Remember to keep that paper out of the way!

When you finish with the one side it should look like this ...

You'll still only have one seam through the paper ...

Finish the other side in the same way.  Flip the paper back and add each strip of fabric one at a time.


When you are finished adding all the strips, the paper should be covered.


Trim the block to 6' square and rip out paper along the one seam. (Please excuse my ugly ironing board cover!)

And you have another completed block to add to the mix.

Hope this helps you understand the process better.  If this doesn't answer your questions about my method, please let me know! :-)

Happy Sewing! :-)

Sunday, January 8, 2012

Scrap Attack Strings QAL - Block Tutorial


Welcome to the block tutorial for the Scap Attack Strings QAL.  I introduced the project here.  I am choosing to semi-paper piece my block.  I say semi-paper piece because I like the accuracy of paper piecing, but I don't like ripping out all the paper!  LOL  And I don't want to rip paper from 80 blocks later.  So, here's what I am doing...

For each block, you'll need a 6" square of relatively thin paper.  I am using some scrapbook paper here, but will also use notebook paper, etc.  You'll also need one 9" x 1.5" white solid strip of fabric.  And assorted scraps - strips ranging from 1" wide and larger.  I am aiming for 3 strips on either side of my center strip.

Step 1:  Use a ruler to draw two diagonal lines on your paper 1.5" apart.

Step 2: Place a 1.5" wide strip of solid white fabric on the paper between the lines. Tack the strip down using a couple pieces of painter's tape on one side.  (Painter's tape is easily removed and reuseable for this project.)

Step 3:  Select a scrap and lay it on top of the white strip - right sides together.  Make sure the strip will cover the piece of paper! :-)  Use a 1/4 inch inseam and shorten your stitch length for this seam.

Step 4: Remove the tape.  Press the seam open away from the white center strip.

Let's get ready to repeat the process on the other side of the white strip.  Fold the paper out of the way so it won't be in the seam you are about to stitch. 

Stitch the two strips together (I go back to my regular stitch length now that I am not stitching through paper - it's faster!)

Step 5: Keep adding strips on each side - moving the paper out of the way until you have enough fabric to cover the square of paper.

Step 6:  Once you have enough strips added to cover the paper, press your block.


Step 7:  Place your block face down on a cutting mat.  Line it up with your mat's grid if it has one.  And slice the edges off to square up your block.  (Note - I use the grid as my guide, not just the paper.)

Step 8: Gently rip the paper off the block.  I like to hold the seam at the top to make sure I don't rip out any stitches with the paper.  :-)  Using thin paper and a shortened stitch will make this easier.


Repeat!  Again, I will be making 2 per week for a total of 80 over the next 10 months/40 weeks.  :-)

If you have any questions, please ask!

Happy Sewing! :-)