
Last week, when I posted the tutorial for the Scrap Attack Strings QAL block, some folks had some questions about what I am doing with the paper during the process of making the block. So, I made another block and took photos of the step-by-step process.
Ok, so you'll need to cut a 6" square and mark it as shown in the first tutorial. Once you've sewn your center strip and first side strip together (through the paper), here's what you do ...

With the fabric facing down, fold the paper away from the where you will be adding the next strip.

It should look like this ...

Now flip the block back over so the fabric is facing up.

Pin a fabric strip to opposite side of the white center strip. (Note the paper is folded back and you're only pinning through the 2 layers of fabric.

And stitch the seam. Notice the paper is folded so it is away from the needle.

Now press the seam open.

Ok, let's flip the paper back the other way so we can keep adding strips.

Turn the block face up and pin a fabric strip.

Note: the paper is still out of the way and you are pinning through just the 2 layers of fabric.

Stitch and press. And add another strip. Remember to keep that paper out of the way!

When you finish with the one side it should look like this ...

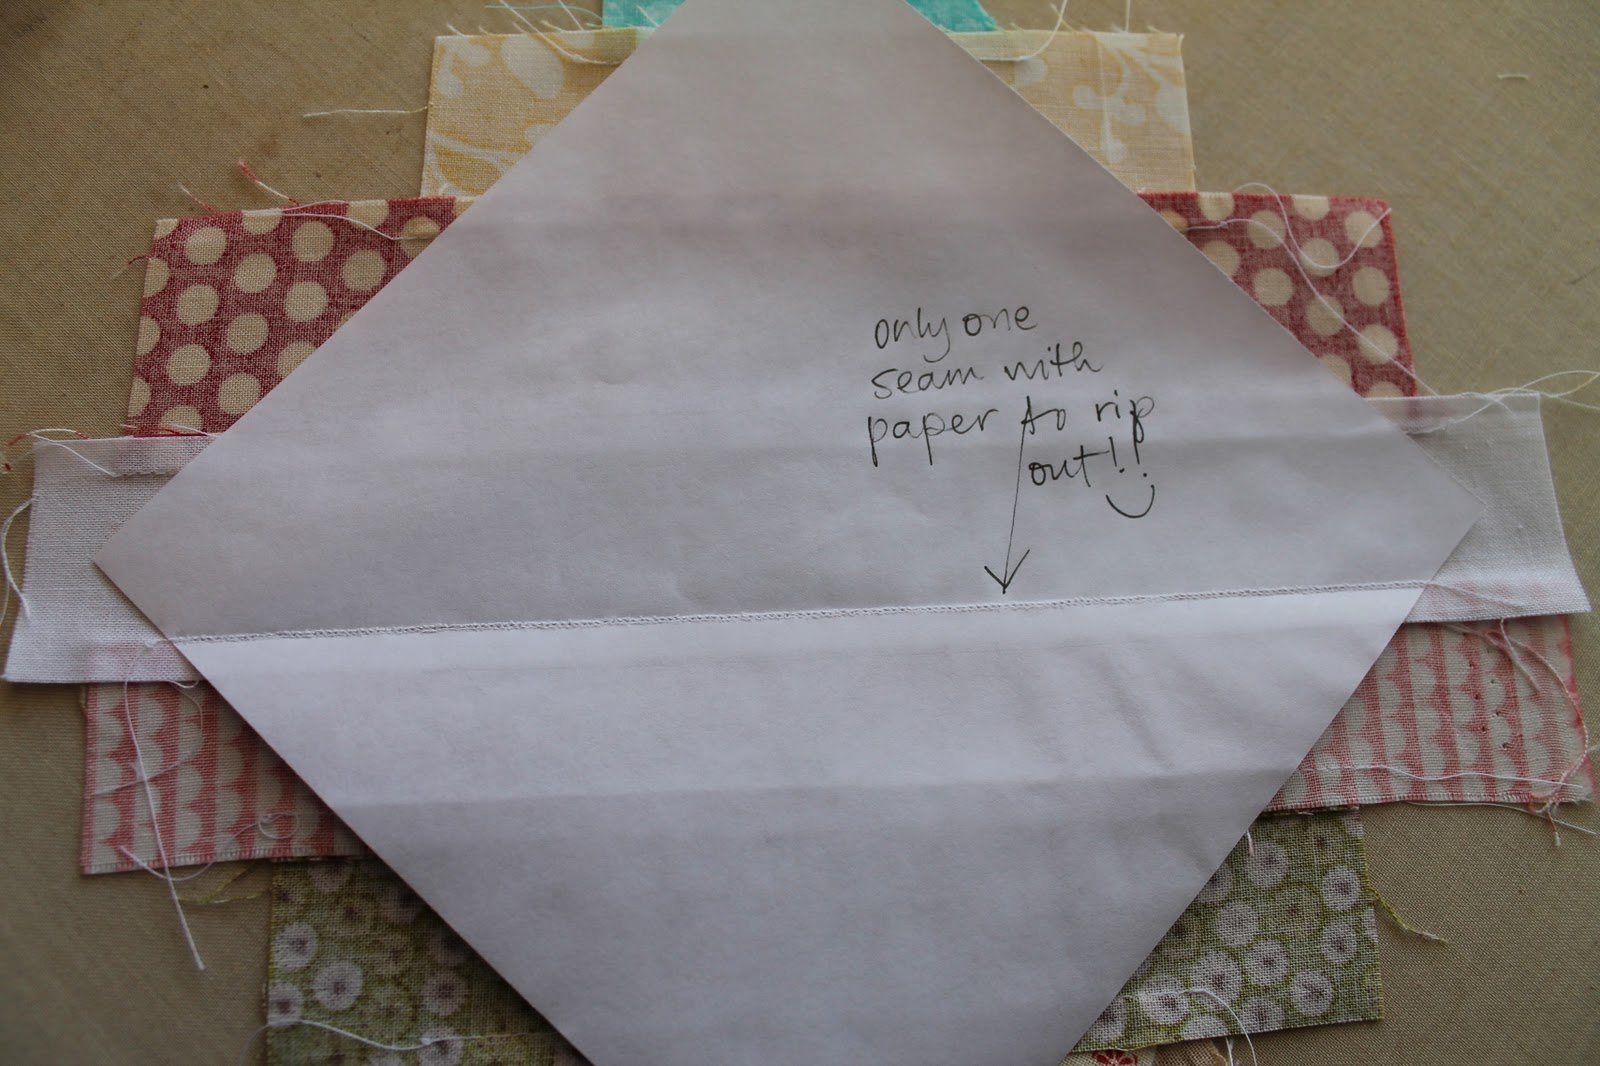
You'll still only have one seam through the paper ...

Finish the other side in the same way. Flip the paper back and add each strip of fabric one at a time.


When you are finished adding all the strips, the paper should be covered.


And you have another completed block to add to the mix.

Hope this helps you understand the process better. If this doesn't answer your questions about my method, please let me know! :-)
Happy Sewing! :-)
I updated the post with explanations and bigger photos! :)
ReplyDeleteLooks great. I got it the first time, but thank you for the extra help!
ReplyDeleteI love that you only have one seam to rip off the paper...so clever - I'm going to try my next string blocks like this. Thanks!
ReplyDelete