Hey y'all! So far it has been an exciting week around here ...
Monday morning I finished and mailed off my Modernista Homemade swap package and then got ready for some my of my girlfriends to come over that evening ... while tidying up, I noticed a small lizard in the dining room. Freak out moment. Especially since my husband wouldn't be home before my friends came over. Bigger freak out moment. My husband's advice to "make a game of it" when everyone got there was not acceptable! LOL I tried to swoosh him outside, but he skittered under the couch. I solved the problem by walking outside and asking the neighborhood elementary boys who were playing basketball next door who wanted to earn $20. Four of them came running at me. I explained the lizard needed to go, there should be no blood or guts on the carpet, and that the TV better not get knocked over. A very entertaining 20 minutes later, the lizard was rescued and returned to the outdoors.
More exciting, though, was getting to see Chicago The Musical last night! Wow! What an incredible show. Christie Brinkley was supposed to star, but was sick so they flew in the lead from NYC. I am sure Christie is good, but I think we got the better deal on that one. :-) If you get a chance to see it, you should.
Anyway, I know y'all probably come here for fabric-based stuff, so here's some quilty stuff for you ...
My Modernista Homemade swap partner has a sewing area in the corner of her bedroom. She likes big florals and birds and wanted a red and cream theme with accents of gray and blue and she asked for either a machine cover or a sewing organizer. Needless to say, I felt a little goofy posting my fabric choices in the Flickr pool because (A) I was sure it would give it away and (B) well, most people wouldn't immediately associate "modern" with them. So several "pretty, but not for me" type of comments later I had a few doubts.
I decided to use my Etchings charm pack and make it happen anyway. I bought some ruler twill tape on Etsy and added it on.
I like balance in my projects and decided to do a big center panel instead of an off-center one in the pattern that I was using. I'm also still pretty new at the embroidery thing, so that also helped make my decision. :-)
I really love the perle quilting on this. I am no longer scared of hand quilting since the Tiger Tape really made it pretty much fool-proof! I found some shell buttons at the big box store and added them after I quilted the line down the sides. This wasn't a problem, since the machine cover is completely lined when you are done.
I almost skipped the piping, but I think it adds a nice touch ... and I learned some things along the way that I will do differently the next time I use piping but overall I was pleased with it.
Overall, I really love it. She should get it today and I am hoping she does too. I might have been checking the tracking and the Flickr group anxiously to see if she's gotten it yet and what she thinks.
I also made a pin cushion and trash bucket caddy thing using this tutorial from Elizabeth Hartman - its called the "Weighted Pincushion Organizer." And its really easy to make.
I used some scraps from the cover project and I think it turned out pretty well. The little bucket is removable as well. I just thought a matching set would be nice. :-)
I added a few other things and sent off this package. :-)
I haven't gotten anything from my secret swapper yet, but will update here when I do.
Happy Sewing! :-)
Showing posts with label Sewing Studio. Show all posts
Thursday, August 2, 2012
Wednesday, April 11, 2012
A New Cutting Table
Hi! I think its only fitting that I share an update on my new cutting table on WIP Wednesday ... since my sewing room is still a work in progress. (I promise to finish cleaning it up and share some photos with you! :-) I really wanted a bigger space to cut fabric since moving my machine every time is really annoying. So, I decided to make a smaller version of the one we have at the shop. It's really easy to do so I thought I'd share a quick tutorial here ...
I had a 3x3 shelf already ... you know one of those you can get from the big box craft stores and you just screw the boards together. I picked up a second one and placed them back to back with some space in between them.
They are about 36" wide and so I asked my pops to cut a board that was 36" x 45" to span across them and make a table. So you'll need a board and a felt back table protector pad.
Unfold the table protector face down and put the board on it. Trim to size and fold over the edges and secure with tape. I just used some packing tape on the corners and a few places on each side.
Now, just place it on top of your bookcases and viola!
Lots of space for baskets and cutting! (Looks like I could use a bigger mat!) I decided to put a basket of my WIPs on my table so they are more "in my face!" :-)
What do you think? Do you have a cutting table or special set up?
Thanks for stopping by today! Hope you have a wonderful day!
Happy Sewing! :-)
Tuesday, April 3, 2012
Construction Zone ...
Hey y'all! I decided to go crazy and rearrange almost everything in my studio today! Here's a "mid-move" photo from my phone ...
All the furniture is in place, now to just organize and put everything away. I promise to share a "tour" later this week when it is all finished.
Happy Sewing! :-)
All the furniture is in place, now to just organize and put everything away. I promise to share a "tour" later this week when it is all finished.
Happy Sewing! :-)
Thursday, January 26, 2012
Get Organized: A Prettier Dry Erase Board
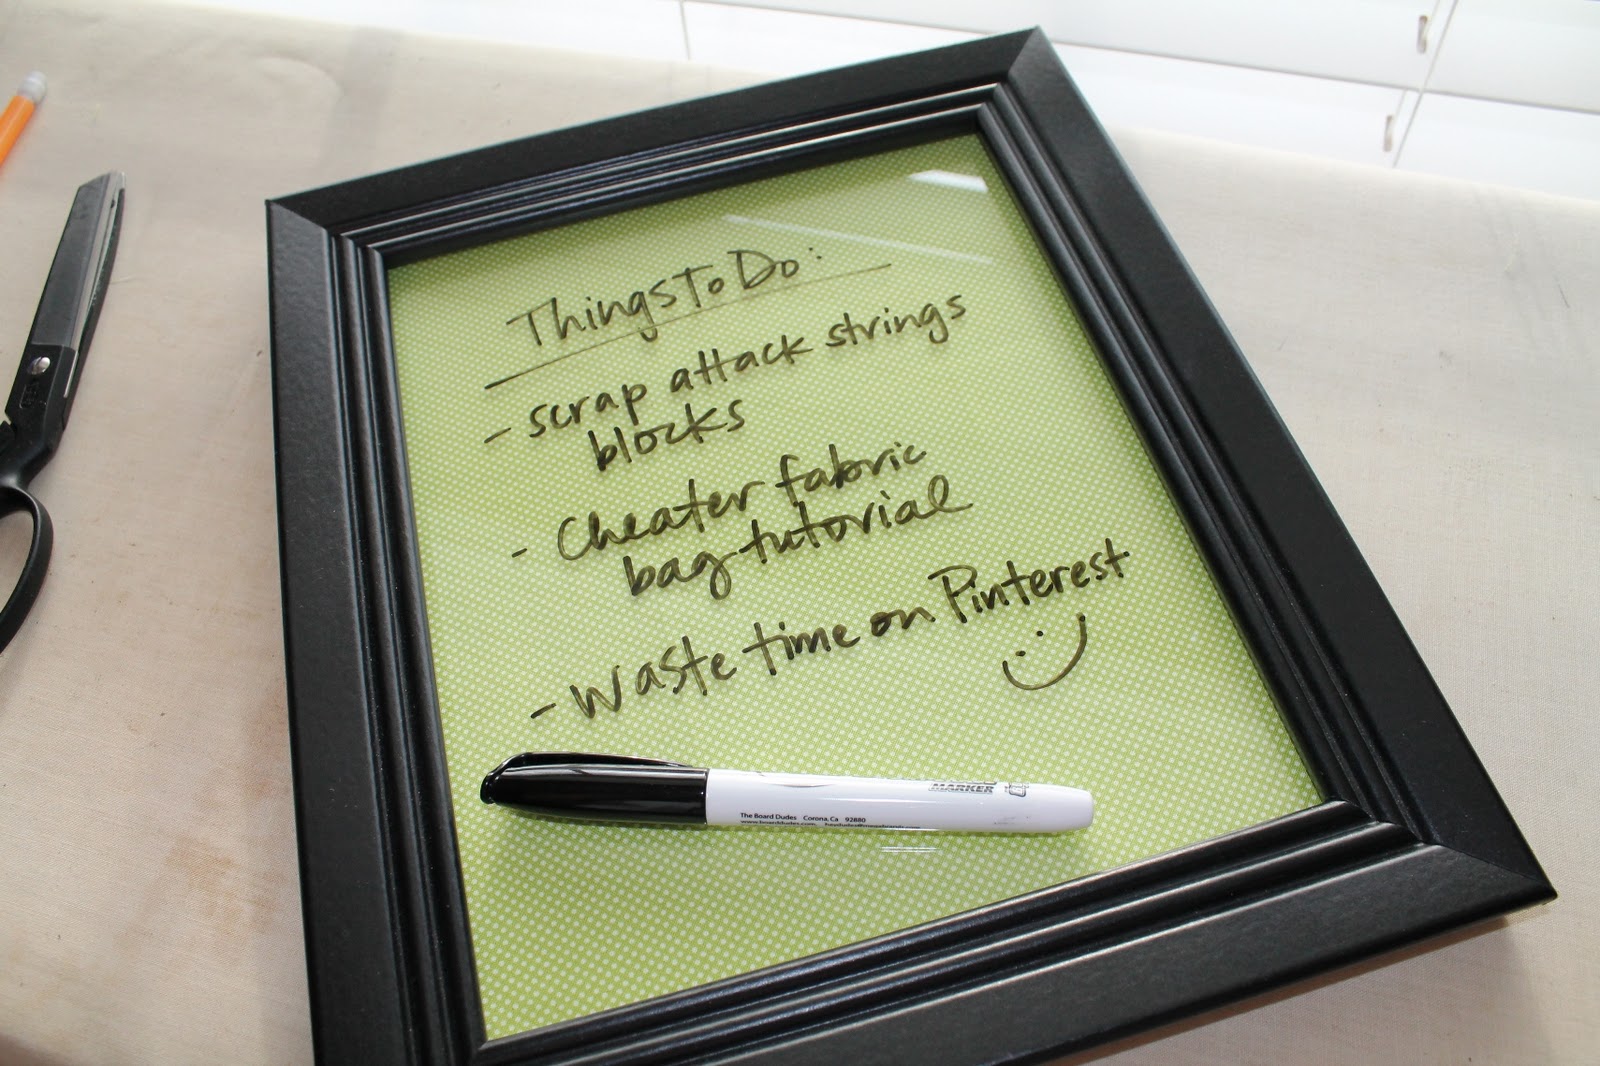
Hello again! If you are anything like me, you probably find yourself always making lists. I make lists all the time - at home and at work (a teacher loves and lives by a good list). Dry erase boards can be pretty ugly sometimes, so today I have a super easy and quick tutorial for making a prettier dry erase board. Ready?!
First, you'll need a frame. Get a cheap one. I got this one at a "big box" store for $3.
Next, take the mat out and trace it on a plain piece of white card stock. Cut the card stock down to size. (Mine was 8 x 10.)
Then, select a pretty fabric. I am using Ruby Dot in Lime. (Note - you probably want to use one that isn't took dark or busy - something that will be a nice background to your list.) Iron your fabric and place it face down with the card stock on top. Trim the fabric so you have a little border around each side.
Now, get some tape. I love the blue tape ... its easy to rip, remove and use again. Fold the edges up and tape them down.
Put the fabric in the frame behind the glass and secure the back.
And you're ready to list away ...
Here's a few ideas for your new pretty dry erase board, which can be used all around the house!
I recently picked up a larger frame (11 x 14) that I plan to spray paint first (it's an ugly "wooden" color) and make another board. I also thought it might be kind of fun to make a patchwork "calendar" (squares sewn together with different prints) to put behind the glass. The best part of this is that you can quickly and easily change the fabric out when you have a new favorite! :-)
So what do you think? I'd love to see your prettier dry erase board if you make one! :-)
Don't forget there is still time to share an organizing tip for our current Stitch & Share Challenge. We'll draw an random participant to receive a $20 gift certificate to the shop.
C'mon back Saturday for the new guest post in the "Get Organized' Series.
Happy Sewing! :-)
Thursday, January 19, 2012
Get Organized: Rulers and Scissors
Hi again! Our "Get Organized" Series is well underway ... did you see the awesome Hanging Pockets Organizer that our friend Amy posted?! I love that she used laminated fabric to make the project so quick and easy. I am happy to share another tip for storing supplies today - this time its all about my rulers and scissors.
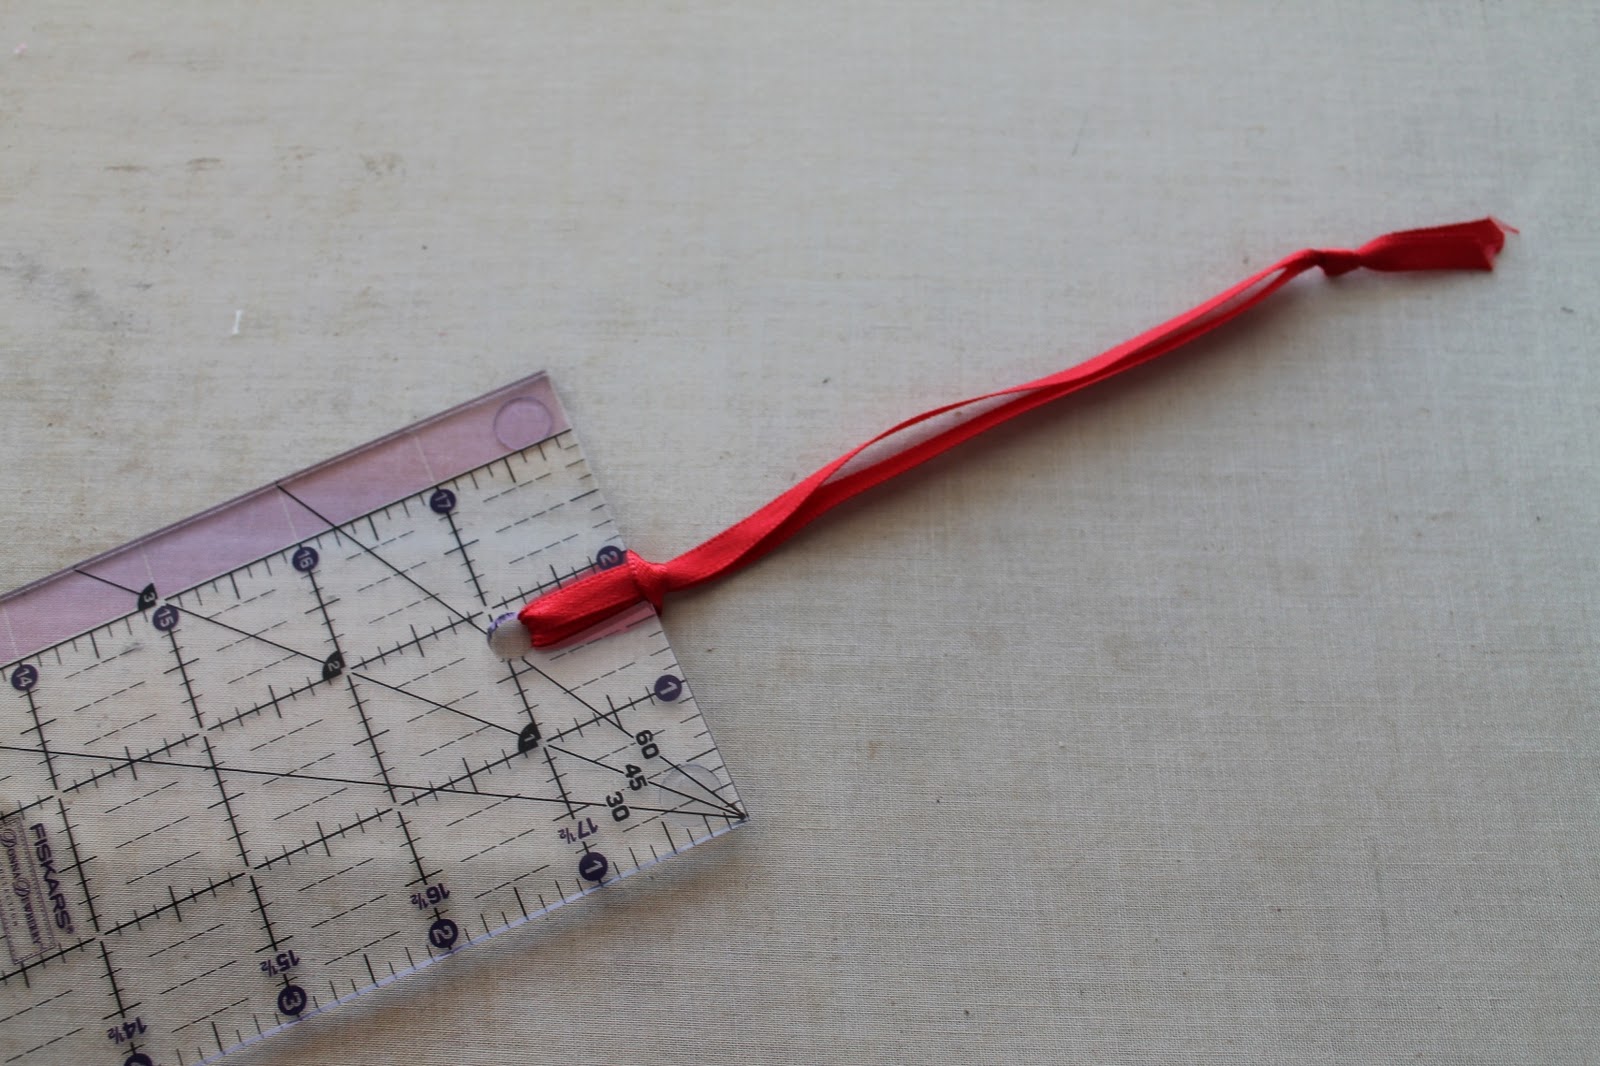
First, let me say that I love Command hooks. You can move them around and you don't have to have any tools (or a handyman!) around. I have about 8 in use in my sewing room right now. I even used them to hang this wall organizer project. :-) They do have brushed nickel looking "fancy" hooks if you prefer. Several of my Command hooks are used to hold rulers and scissors. Most of my rulers have a hole in them - probably so retailers can hang them - so that makes it super easy to hang them up in my room too. All you need is a loop of ribbon ...
Thread it through the hole ...
Tuck the end inside the loop ...
And pull and you're ready to hang your ruler. The nice part is that you can remove the ribbon and replace it again if it gets in the way while cutting fabric and trimming quilts, etc.
Here are my rulers ... I keep my longer rulers on one hook and my specialty and smaller rulers on another.
I also like to use a hook to hold my scissors. I feel like I am always looking for my scissors and having them right above my ironing board makes them easy to grab and put them back where they go.
I have my ironing board nestled between a dresser and a bookshelf (sometimes this is a little inconvenient, but its usually ok) and the table with my machine and cutting mat forms an "L" shape with my ironing board. I like having my rulers close, but out of the way. And I have a little stand I bought at my local big box store where I keep my pins, smaller scissors, and assorted notions that I might be using on a project at the end of my ironing board.
How do you store your rulers and scissors? I'd love for you to share! Don't forget to link up your organizing tips to the current Stitch & Share Challenge.
Happy Sewing! :-)
Friday, July 8, 2011
Easy Wall Organizer
Happy Friday, y'all! I got to playing around in my sewing room this afternoon and came up with this ...
Cute, huh? Did I hear you say you needed something to get important stuff off your sewing table, too? Well, I guess you're lucky I took pictures as I went ... tutorial coming tomorrow! :-) See ya then ...
Happy Sewing! :-)
Cute, huh? Did I hear you say you needed something to get important stuff off your sewing table, too? Well, I guess you're lucky I took pictures as I went ... tutorial coming tomorrow! :-) See ya then ...
Happy Sewing! :-)
Sunday, July 3, 2011
A Pink Problem
I have a problem ... I'm willing to admit here for everyone that I collect pink fabric. A lot of pink fabric. Refer to Exhibit A:
OMG! I really should resist the urge to add more pink to my collection! LOL :-)
Yesterday, I dd some more overhauling of the sewing room. I'm not ready to give you the grand tour yet, but I thought I'd share my progress on my fabric "collection". I went through almost all of my stash and organized it better. I still need to work on the holiday/seasonal stacks, but this is the majority of my personal "color wall."
The last time I posted about my shelf, someone asked about how I get my fabric to stand up straight. Well, I use these boards and this tutorial (I don't pin mine down and I only wrap stuff that's more than a half yard). Hope it helps you if you need a system!
Talk at y'all soon ...
Happy Sewing :-)
Subscribe to:
Posts (Atom)