Showing posts with label y-seams. Show all posts

Thursday, June 23, 2016

Weekender Bag Sew Along : Week Two (Pocket Piecing)


Hey there friends!  I promise I've done some sewing since my last post ... maybe not as much as I had hoped, but I was on vacation.  :-) 

I usually sew on a Bernina 710, but took my smaller 210 to the Outer Banks with me and enjoyed sewing with the ocean and sand dunes, and the occasional wild pony, in the background.  Relaxing and a fun week away.  


If you follow me on Instagram (@sewlux), you've seen these photos, but I wanted to walk you through a little more of my pocket piecing process.

You may have also seen that Sew & Sew by Chloe's Closet arrived right before I left for the beach and I changed my mind about my fabric choices...  I mean, they are just so pretty!


I knew I wanted to put an initial on one end of the pocket.  I decided it would be super cute to put it inside a spool ... I used the Spell It With Moda letter as my inspiration and scaled it down... way down.  The letter finished at 1.5" wide x 2.5" tall.  I made the Mini Spool from Thimble Blossoms a little taller to accommodate that but otherwise followed Camille's directions.  I think it's really cute if I do say so myself! ;-)


My next end pocket is the cute little flower from Handmade - also a mini pattern by Camille. I fussy cut a bunch of flowers from this print as the center.  And can we talk about these measuring tape prints?!  I plan to add some borders to this one and to make it large enough.


Since I was traveling and wasn't sure what kind of iron and ironing board might be available at the beach house, I invested in a cute little travel iron and ironing mat that I got off of Amazon.  While small, this iron definitely did the job and got super hot.  I didn't use steam, but it was hot enough to press my seams nice and flat.  (Side note: after reading some reviews about these ironing mats/pads, I brought along a little tv tray table and used it as my ironing surface just in case ... and that way I didn't risk ruining the dining table at the house.)


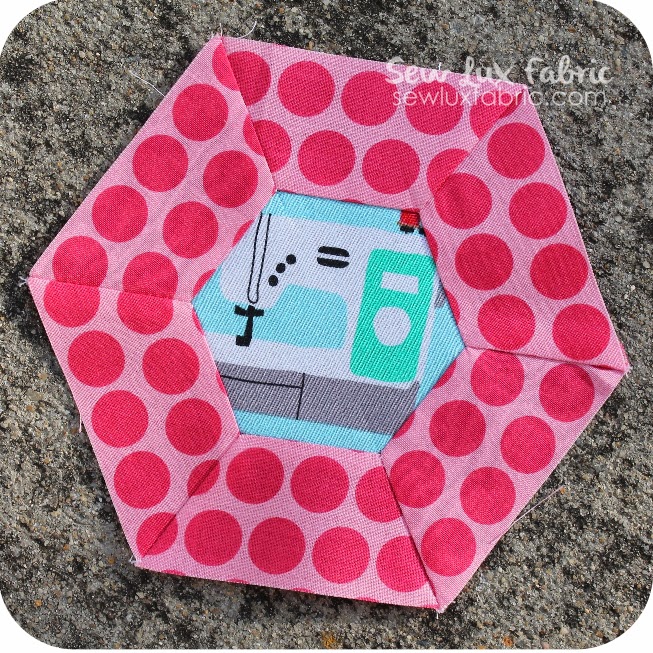
I decided to piece some of the small Smitten blocks for both of my larger pockets.  I machine piece these and use the Marti Michell templates to cut and mark my fabrics. 


I used a paper grocery bag to make a template of the pocket size and then the MM templates to mark the layout to figure out how many blocks I would need to make.  And then I had a great time playing around with fabrics ...


Can all the blocks be my favorite? I don't think I can choose just one... ;-)

I think this bag is going to be totally dreamy with these colors and florals mixed up.  To make the pocket panel big enough, I added some partial unpieced hexagons (using the largest whole hexagon template in the set to cut them) along the top and sides.  Since the bottom of the hexagons on the second row will be cut off some, I kept all the most intricately pieced blocks along the top row where they could be seen.


I will be quilting up my pockets and other panel pieces this weekend ... I will post an update in a few days!

Happy Sewing! :-)

Sunday, July 19, 2015

Smitten Quilt Along : Small Blocks Four and Five

Hey everyone!  How are your Smitten quilts coming along?  I am sorry I was running late this month getting this posted.  I got distracted with my Thimble Blossoms Scrappy sampler.  In all honestly, these two little blocks took no time at all and were really easy once I finally sat down to make them!


For more details on the Smitten Quilt Along, visit this post here for dates and supplies, etc.  If you haven't purchased templates, go ahead and make your's using the pattern and template plastic or other material of your choice.  (Be sure to add the seam allowance if making your own templates.)

We will start with Small Block Four ... 


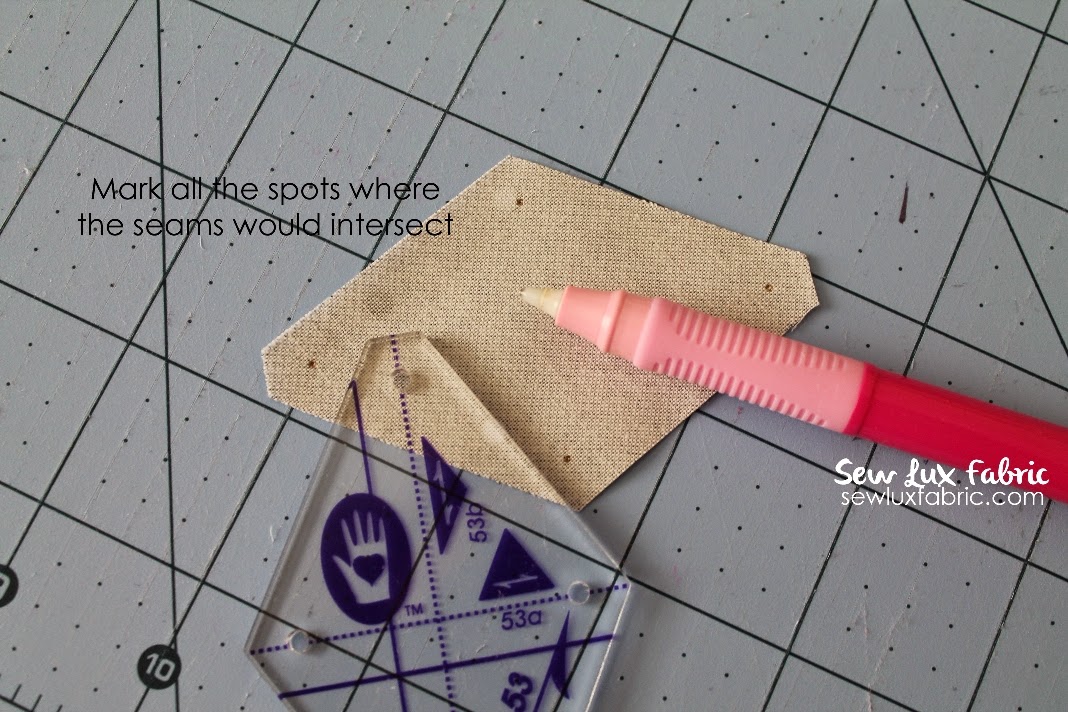
Cut out your fabrics and then mark your pieces.  Mark the wrong side of your fabric pieces with dots where the 1/4" seams would meet.  (The acrylic templates have holes, making this super easy!) Alternatively, you could use your ruler and pen to draw lines along the seam allowances to mark your start and stop points.


Lay out your block in a pleasing arrangement.  Here, I am just using two prints and alternating them. 


Next, sew two sets of triangles together.  You can sew edge-to-edge since there are no Y-seams in this one! (yay!)


Press and then get ready to add the third triangle to each pair. 


Again, we'll sew edge-to-edge since we won't have to join the two halves with y-seams. 


You'll have two halves like this.  If you are using two alternating prints, they'll be opposite of each other like shown. 


Pin the two halves together.  I put a pin through the intersections to help line things up nicely. 


Viola!  Really easy block!  :-)  You need four of these cuties.


Next up ... Small Block Five. 


Cut out your fabrics and then mark your pieces.  Mark the wrong side of your fabric pieces with dots where the 1/4" seams would meet.  (The acrylic templates have holes, making this super easy!) Alternatively, you could use your ruler and pen to draw lines along the seam allowances to mark your start and stop points.

I elected to fussy cut all three diamonds from the same fabric for this particular block.  But you could do three prints in the same colorway or whatever you like!


Next, sew two diamonds together.  You'll sew from the outer edge (left) to the dots in the center of the block (right). Be sure to backstitch at the dots. 


Your diamonds should look like the photo below. Next, you'll attach the third diamond by sewing from the center dots all the way to the outside edges. 


When sewing on the second side, be sure you you move the opposing diamond out of the way so it doesn't get caught in your stitching. 


All done!  Quick and easy!  I pressed all the seams in one direction going around the block (clockwise). 


You'll need eight of these pretties!  

I am hoping to get caught up in the next few weeks with all my blocks so far.  Don't forget to use #smittenquilt and #smittenquiltqal on Instagram. :-)

If you have questions, leave a comment, email me or tag me on IG!

Happy Sewing!  :)

Wednesday, May 6, 2015

Smitten Quilt Along : Large Block Four and Small Block Two

Hey everyone!  I hope you are ready for more y-seams!  :-)  This month we are working on Large Block Four AND Small Block Two.  Small Block Two is the center of Large Block Four.  The best part is that once you finish the center of the Large Block, you can piece the rest with no Y-seams! :-) 

For more details on the Smitten Quilt Along, visit this post here for dates and supplies, etc.  If you haven't purchased templates, go ahead and make your's using the pattern and template plastic or other material of your choice.  (Be sure to add the seam allowance if making your own templates.)

Note:  I glue baste my pieces.  I didn't take pictures of this for this month, as I shared them in the first month's post

Cut out your fabrics and then mark your pieces!  It's all about connecting the dots!  Mark the wrong side of your fabric pieces with dots where the 1/4" seams would meet.  (The acrylic templates have holes, making this super easy!) Alternatively, you could use your ruler and pen to draw lines along the seam allowances to mark your start and stop points.

Sew the half hexagons into two sets of three pieces. Sew from the outer edges to the inner dots. Then attach the two units to the center. This is just like we've done in previous blocks. 


Your finished center section will look like this.  I pressed toward the center. This completes the Small Block Twos.  It is also the center of the Large Block Four.


To make the Large Block Four, you need six triangles and six diamonds.  Lay them out as shown below.


We're going to assemble this without Y-seams.  So sew edge to edge!  Start by sewing a triangle to the upper left and lower right sides of the center as shown below. Press toward the triangles.


Next, sew a triangle to a diamond as shown below.  Make two units.  Press toward the triangles.


Attach these triangle/diamond units to the center hexagon.  Press away from the center.


Now, you should have a triangle and two diamonds left for each of the remaining two sides.


Attach the triangles to one diamond and then to the other.  Press toward the triangle for both seams.


Sew the remaining sides to the center hexagon.


You'll be lining up the edges as shown below.


Press away from the center hexagon.   And you're all finished!


Now plan and sew some more ... you need 2 completed Large Block Fours and 6 Small Block Twos.


And that's it!  You're done!  Yippee!


I hope these photos were helpful to you...  I can't wait to make a few more myself and to see your's too! Don't forget to use #smittenquilt and #smittenquiltqal on Instagram. :-)

If you have questions, leave a comment, email me or tag me on IG!

Happy Sewing!  :)

Saturday, March 7, 2015

Smitten Quilt Along : Large Block Two

Hey everyone!  I hope you are ready for more y-seams!  :-)  The Large Block Two comes together similar to last month's.  But with a few less pieces, its pretty fast ... especially since you've got the y-seam down now, right?! ;-) 

For more details on the Smitten Quilt Along, visit this post here for dates and supplies, etc.  If you haven't purchased templates, go ahead and make your's using the pattern and template plastic or other material of your choice.  (Be sure to add the seam allowance if making your own templates.)

Note:  I glue baste my pieces.  I didn't take pictures of this for this month, as I shared them in the post about last month's blocks

Don't forget to mark your pieces!  It's all about connecting the dots!  Mark the wrong side of your fabric pieces with dots where the 1/4" seams would meet.  (The acrylic templates have holes, making this super easy!) Alternatively, you could use your ruler and pen to draw lines along the seam allowances to mark your start and stop points.


We'll use these dots as our start and stop points for sewing. Sew a 1/4" seam and always backstitch to secure, but don't sew past the dots, unless we are sewing to the edge.  (You'd sew to the edge when the seam is not part of a Y-seam intersection... this will hopefully make more sense in pictures below.)


Start by sewing the triangles to six hexagons.  Go ahead and chain piece these - these seams are not part of a Y-seam, so they can be sewn from edge to edge. 


Press toward the triangles once sewn. 

Next, we'll join together the hexagon-triangle units into two sets of three units.  You'll sew dot-to-dot to join these units. 


Then its time to add a diamond in each exterior opening, which complete the overall hexagon shape of the finished block. You'll be sewing from the inside dot (at the Y-seam) all the way to the exterior edge.  


Add in a diamond on the opposite side to finish the half unit.  Repeat with the other trio of hexagon-triangle units.


Join each half to the center hexagon just like we did with Large Block One.  We're sewing dot to dot to join to the center hexagon.


You'll join the sides of the two halves (again - just like last month with Large Block One), sewing dot to dot. Then sew in the remaining two side diamonds just as you did before - sewing from the inner dot to the exterior edge. 

I pressed all my seams in the same direction - refer to the photo below. 


And that's it!  You're done!  Yippee!

Now plan and sew four more ... you need 5 completed Large Block Twos.

I hope these photos were helpful to you...  I can't wait to make a few more myself and to see your's too! Don't forget to use #smittenquilt and #smittenquiltqal on Instagram. :-)

If you have questions, leave a comment, email me or tag me on IG!

Happy Sewing!  :)

Friday, February 6, 2015

Smitten Quilt Along : Large Block One

Hey everyone!  I hope you are ready to sew some hexagons together!

For more details on the Smitten Quilt Along, visit this post here for dates and supplies, etc.  If you haven't purchased templates, go ahead and make your's using the pattern and template plastic or other material of your choice.  (Be sure to add the seam allowance if making your own templates.)


This month, we're tackling the Large Block One.  This is probably where you will want to fussy cut your favorites!  I consider this the showpiece block for this quilt. There are a lot of pieces in this one, so it may be worth it to cut and piece several at a time after you get the first one under your belt!  :-)

Grab your pattern, templates and marking pen and select your favorite prints!  Following the pattern, cut out all the correct pieces needed for the block.  Update:  Pattern Error -  Someone commented that there is an error in the cutting directions for this block.  You need to cut piece "D" instead of "B" based on the printed templates in the pattern.  Since I used acrylic templates, I just followed the pattern diagrams and did not notice the misprint initially. 

(Cutting TIP:  If you are using the Marti Michell templates and don't need to fussy cut, follow the directions included with the templates for cutting from strips to make quick work of your cutting.)

Mark the wrong side of your fabric pieces with dots where the 1/4" seams would meet.  (The acrylic templates have holes, making this super easy!) Alternatively, you could use your ruler and pen to draw lines along the seam allowances to mark your start and stop points.

We'll use these dots as our start and stop points for sewing. Sew a 1/4" seam and always backstitch to secure, but don't sew past the dots, unless we are sewing to the edge.  (You'd sew to the edge when the seam is not part of a Y-seam intersection... this will hopefully make more sense in pictures below.)


Here's how I machine-pieced mine together...


I worked in segments to build the border around the main center hexagon.  To try and sew more efficiently, I prepped and then sewed all the same seams for each of the six segments at the same time.

I'll refer to the blue diamond as the center and the yellow and pink pieces as the sides.  Pin or glue baste and then join the top and bottom side pieces by sewing from the inner dot all the way to the outer edge.  Complete this on both sides, remembering to start sewing at your dot (1/4") from the edge where the side pieces will join the center diamond.


Next join the side piece to the center diamond.  Pin or glue baste to keep things in place.
To glue baste, draw a thin line of glue about 1/8" from the edge.  This should be inside your seam allowance. Be careful not to glue all way into where the Y-seam will be.  Lay the fabrics right sides together and carefully press to heat set the glue.  Then go ahead and glue or pin down the next seam.


You'll need to shift the fabrics a little as you line up the pieces. It should look like this ...


Head over to your machine and sew the pieces together.  Start at the joint in the Y-seam and begin at your start dot, being sure to move the other pieces out of the way.  Sew all the way to the edge.


Complete each seam to join the center and outside pieces.


Next, join the left side diamonds in the same manner to get a completed segment.  Make six segments.


Next, we'll join the segments of the border to the center hexagon. I chose to join two sets of three segments. You'll start at the dot on the inside of the segment border and sew to the outer edge.


Then join the segments to the center hexagon. Pin or glue base in place.  If glue basting, be careful not to glue all the way into the Y-seam, as we will need to shift the fabric around to sew the seam. Sew all seams from dot-to-dot (not all the way to the edge!).


Sew both sides on and then join the border by sewing the final two seams. You'll sew from the dot (inside of the border) all the way to the edge of the border.


Carefully press your block and admire your work!  :-)


Now plan and sew four more ... you need 5 completed Large Block Ones.

I hope these photos were helpful to you...  I can't wait to make a few more myself and to see your's too! Don't forget to use #smittenquilt and #smittenquiltqal on Instagram. :-)

If you have questions, leave a comment, email me or tag me on IG!

Happy Sewing!  :)

P.S. Learn more about glue basting from my friend Cristy here.