Showing posts with label Quilts. Show all posts

Sunday, June 7, 2015

Moda Bake Shop - Sunset Ridge Quilt

Hey there!

Just wanted to pop in and share a fun quilt I made for the Moda Bake Shop last week.


Stop by and see the quilt and tutorial here.

This is SO fast and easy!  We'll have kits available soon.  :-)

Happy Sewing!

Monday, February 23, 2015

Fresh Cut : Piece of Cake 3 Quilt

Fresh Cut by Basic Grey for Moda is here!  I have been waiting for this collection since the moment I saw it when our rep emailed us links of upcoming collections.  The pinks, the aquas, the greens, the florals ... pretty much all of it!  I love it!  


One of the great things about this collection is that there are some great low volumes and stashbuilders in this one in addition to all the beautiful floral prints.  We ordered our favorites for the shop.

There is a little sew along kicking off this week on Instagram with Camille's Piece of Cake 3 pattern. This is a quick and easy pattern that lets the fabric shine ... so I couldn't resist despite having several projects going on already...


I've got it all cut out and some of it glue basted and am ready to sew if I can find some time in the evenings after work this week!  :-)


Happy Sewing!  :-)

Saturday, December 27, 2014

Gene Pool Quilt : Progress

Hey friends!

I hope you all had a great holiday with family and friends.  :)  After crazy last minute sewing and running around, I spent the majority of yesterday working on a new quilt top ... just for fun.  (The best kind.)

Of course, I didn't really need to start a new project, but I couldn't stop myself!


We got the new Gene Pool quilt pattern by Jen Kingwell in last week and I had some Moda scrap bags from Honeysweet & Mirabelle by Fig Tree Quilts and I knew they'd play so nice together.


I've added in a little bit of Somerset as well to help me get the size a little better. So far, I'm having a lot of fun playing around with placement and piecing this together.

I hope to finish it next week ... and I should really get a move on since this isn't coming off my design wall without being sewn together!

I'll keep you posted ... one of my goals in 2015 is to do better about sharing my work here and not just on Instagram!

Happy Sewing!  :-)

Friday, February 14, 2014

Quilt Pattern : Snow Tires

 Happy Friday!

It's been pretty cold here as we've had snow and other fun winter weather (ice!) this week! 

I have to admit that I was a little excited to see snow in the forecast so that I could snap some photos of my newest quilt (and pattern!) - Snow Tires

This quilt is a nice sized lap quilt at 52" x 68" and is an easy quilt to put together!

It's a perfect stash busting quilt, but it would look great from a single collection of prints as well! 

I was inspired by an antique quilt I saw in a movie.  I quickly drew up the pattern - minus the totally unnecessary y-seams that the original quilt used. The more I worked on it the more I loved it! 

I've been sneaking peeks of this one on Instagram for several weeks.  For those of you who know me, this is not my typical color scheme, but I really love how this turned out - bold and spicy like a good chili on a snowy evening.   


I quilted this one with a concentric circle spiral pattern on my Bernina 710.  It was also the first time I tried spray basting.  I am a fan.  I've spray basted two more quilts since!  


The fabrics are a mix of all kinds of prints and designers.  And many of the tire centers are charm squares from a rainbow charm swap I participated in quite awhile ago.  

The backing is a combination of Flea Market Fancy and Chicopee, both from Denyse Schmidt.  And I used Bella Boysenberry for the binding (the same as the background blocks). 


Have I mentioned I really love this quilt!?

The pattern is now available as a PDF download in our shop.  If you make one, I'd love to see it!  Please share the link, send us an email, or tag me on Instagram (@sewlux) with #snowtiresquilt.

Happy Sewing!  :-) 

Tuesday, February 4, 2014

Preppy Giant Sparkle Punch Quilt

Hey!  Now that its February, I thought I'd get around to sharing a quilt I finished in 2013 ...

Back in December, I was crazy enough to try and finish 4 quilts in the two weeks leading up to Christmas. One of them was a quilt for my husband's niece, who is a Lily Pulitzer-loving college kid.  She made the Dean's List so I figured she was worthy of a quilt for Christmas. ;-)  And it was what she requested when I asked at Thanksgiving if she'd like me to make her something.  Who am I to say no?


I finally decided on a pattern and since it was like a week before Christmas I knew it needed to be big blocks to make this happen in time.  So a Giant Sparkle Punch it was.  I used the tutorial from Elizabeth Hartman here and made all my blocks 6" finished.  (Each star is roughly 18 inches.)


On a mission to quilt this from my stash, I started with a few Lily Pulitzer scraps I had tucked away.  And then went from there with pink and yellow being deemed a requested color scheme.


I am pretty proud to say that (1) this was an all-stash quilt and (2) I actually really did give it to her!  It's so my jam with the pinks and greens in this one.  It was one of the reasons I quilted her monogram in a star point (see above photo in the bottom point of the star) .... so I could force myself to gift it.  ;-)


I am pretty proud of getting the pieced back on straight too.  Of course, being on a tight deadline barely left me any sunlight to take decent photos.  (Geez, my quilts sure look tiny when my giant 6'4" hubs holds them up!)


I also "signed" a few quilts this past Christmas in my quilting by quilting a heart, my initials and the year.  :-)

I am so glad it was well-received.  Had it not, it would have come right back to my house!

Happy Sewing! :-)

Sunday, February 2, 2014

Lazy Sunday QAL : Piecing

It's Sunday and that means its time for another Lazy Sunday QAL update. :)

I've managed to get all of my blocks cut and made this week.  I must say that this is the perfect project when things are a little crazy because its such easy sewing!  There are no fussy pieces, templates or points to match, so you can start and stop as you need to.

And with chain piecing, you can easily get these blocks knocked out in about 20 minutes a day over the course of the week.   If you've been following me on Instagram, you've probably seen me working on these a little at a time over several days.  I didn't even use pins. Easy peasy.  Truly!


Actually the sewing is so laid back, I even managed to rotate my blocks the wrong way!  Fortunately, I don't think it will make a huge difference in the overall design.


I'm excited to throw these on the design wall this week and stitch them all together.

Just like last week, I've pulled a winner from Instagram.  This week, the winner is cdketchie!  She's well ahead of me and was posting a layout this weekend.


Congrats, cdketchie!  We'll be in touch so you can choose your next May Chappell pattern.  :-)

If you haven't started yet, grab a layer cake and join the fun!  You can even make it with fat quarters and you can certainly catch up quick!  :-)

Don't forget to tag your progress this week on Instagram with #lazysundayqal and #isewwithsewlux.

I will see you next week with my finished quilt top!

Happy Sewing!  :-)


Thursday, January 23, 2014

Rose Cottage Quilt Kit

Hey y'all!

I am really excited to share a new quilt kit that we have in the shop.  When we first ordered the Rosey collection by Tanya Whelan, I thought of my friend, Tessa at The Sewing Chick.  I sent her and email and asked if she'd be willing to design a project with the prints we were getting and I was thrilled she said yes!

Check out this beautiful quilt!


You can see more about this quilt here on her blog. And we have kits available and we are offering a FREE copy of the pattern (an $8 value) with purchase of the kit.

Happy Sewing!  :-)


Tuesday, December 31, 2013

Adios 2013 & Quilting Community

As we are just a few hours away from closing the book on 2013, I wanted to share with you about a recent quilt finish and perhaps one of the most important quilts I've made this year.

My husband and I joke that watching his alma mater's football games is like an emotional roller coaster ride. And in thinking about 2013, I would sum the year up as a long roller coaster ride full of loops, and turns, and tunnels. As with every roller coaster, there are ups and downs.  There were definitely some joys along the way, but I'm glad to get off this ride!  :-)

This year, I lost both an aunt and a coworker to cancer.  Both women fought hard and each left behind husbands and two children that loved them dearly.


Following the loss of our coworker, Michelle, this Fall, I felt compelled to make a quilt for her two girls who are just five and one years old.  Michelle's battle was little more than a year and half, but she fought her breast cancer with dignity and a positive attitude that I don't know that I would have been able to muster up. She was an example to all of us at work.  From her, I've learned more about perspective and hope to go through 2014 being more conscious of that - knowing that while things may not always be fun, but there is so much to be grateful for.


I had my coworkers help me piece these blocks in the school's sewing classroom.  That was certainly an experience - as I promised them all they could do it, saying "just put your foot down and drive straight." Well, the blocks weren't perfect, but I made them all work.

I chose the cross block to honor Michelle's faith and then used bright colors as she was always a happy & positive person.  And I wanted this quilt to be fun for her little girls, so bright and dotty was in order.  (And who are we kidding ... dotty is always in order in my projects! :-)


The coworkers who wanted to sign the quilt all signed squares, which I pieced into the back.


It was really fun to see my colleagues light up and say "that's my block" upon finishing this one and sharing it with them before it was gifted.

I had a coworker who is close to the family deliver this for me.  And I hope it was well received and will be enjoyed by her girls for many years to come.


This quilt represents community for me.  And I'm happy to say that one of the bright spots in my year has been finding my own "quilt community" this year.  I've made some awesome friends in fabric who I can laugh with, cry with, and unpick seams with.  :-)  I'm looking forward to a new year of community, creativity, and perspective with you all.

Happy New Year!


Wednesday, October 23, 2013

Holiday Hustle QAL Kit Sale!

Happy Wednesday!

It's hard to believe there's little more than a week left in October!  The holidays will be here before we know it!  That seems just crazy.


If you need some fun and easy projects for your handmade gifts list, check out the Holiday Hustle QAL. We have 7 great new kits in non-holiday prints as well as four holiday versions of this easy lap quilt. And ... they're on sale now through Sunday!  Everything you need for the top and binding of a lap quilt for less than $30!  Check them all out here.

Happy Sewing! :-)

Thursday, August 8, 2013

Holiday Hustle QAL : Sashing & Borders

Happy Thursday!

It's time for another installment in the Holiday Hustle QAL.  Last week, I shared directions for piecing the blocks using just one charm pack.  Today, we'll add sashing and borders. Ready?


Step 1: Gather your yardage and start cutting. 

You'll need  1 yard for the outer border, 3/4 yard of solid for sashing, 1/2 yard for the inner border, and 1/2 yard for the binding.  If you ordered a kit from us, you've got everything you need!


From the solid, cut NINE 2.5" x WOF strips.


Set aside six strips and from the remaining 3 strips, cut NINE 2.5" x 10" strips.


Next, cut FOUR 3" x WOF strips for the inner border.


Then, cut FIVE 6.5" x WOF strips for the outer border.


And while we're cutting, let's go ahead and cut the binding strips for next week.  You need SIX 2.5" x WOF strips.  (Note:  I use 2.5" strips, some folks like to use a 2.25" strip - do what you like!)

Step 2: Sash the block sets

Last week, we made blocks and sorted them into three sets - column A, column B, and column C.  We need to sash between each block in each column.


You'll add a 2.5" x 10" strip between A-1 & A-2, between A-2 & A-3 and between A-3 & A-4.  Repeating the process for column B and column C.  Press toward blocks (away from sashing).  You are NOT adding sashing strips above block 1 or below block 4 in each set.


As you are pinning and sewing sashing, make sure to line up the middle seams in each block to keep your columns straight.  (This will also help with trimming later.)

Step 3: Trim the column strips


After pressing your blocks and sashing, you will have three longer pieced strips.


Use a ruler to trim the long edges of the pieced strips.  You'll trim 4-3/4" away from the center seam in the blocks.

Step 4: Sash the strips together

Ok, next you'll grab the remaining solid WOF sashing strips and start sewing everything together.


Add a WOF strip on both sides of column B. Stitching the length of both sides.  Press toward blocks.


And a WOF strip on the LEFT side of column A and on the RIGHT side of column C.  Stitch the length of both columns.  Press toward blocks.

Then, you'll join the the columns together and then add a WOF strip along the top and bottom of the joined columns.  Press toward blocks.  (Refer to diagram.)

Step 5: Add the borders


Add an inner border (3" x WOF) strip on the LONG sides first.  Then add the top and bottom.  (This is so we don't have to piece your inner border strips.)  Press toward border.


Then, add an outer border (6.5" x WOF) strip on the TOP and BOTTOM first.  If your border fabric is directional, make sure you add them all on in the same way.  :-)

For the sides, we'll need to piece these borders to make them long enough.


Cut one of the WOF strips in half.


Sew one half to each of the two remaining WOF strips.  Trim off the selvage.  And if your prints are directional, make sure you sew them so the pattern is right side up on both pieces.


Then stitch the side border strips onto the quilt top.  Press toward the border. (Refer to diagram.)

Step 6:  Admire your work!


We'll meet back next week for quilting and binding!  :-)

Tuesday, August 6, 2013

In Progress : 16 Patch

What's stitchin' y'all?

I managed spend quite a bit of time stitching this past weekend and I must say it was pretty glorious to spend several hours stitching away at my leisure.

I got to hang out Saturday morning with my friend Sarah of Stitching & Bacon and we nerded out about fabric and quilts over coffee.  Super fun to talk fabric with her as many of my "real life friends" aren't quilters. She was telling me about her 16-patches and how fun and fast they were, so the decision was made!  Of course, I had to make one too.

Then when the mail came that afternoon and I saw the new HGTV magazine, I was inspired by the color combo on the front.


I had intended to go with pink, aqua, red and B&W low volume, but ended up nixing the red.


What do you think?  I whipped out 12 blocks in an evening and pieced the 30 x 40 baby quilt together rather quickly.

I did start quilting this on Sunday, but due to a tension issue, have since picked the quilting out.  Ugh.  I really think a different backing would be better too, so I have a feeling I will be unbasting and rebasting at some point this week.  I'll keep you posted!

Happy Sewing!  :-)

Monday, July 15, 2013

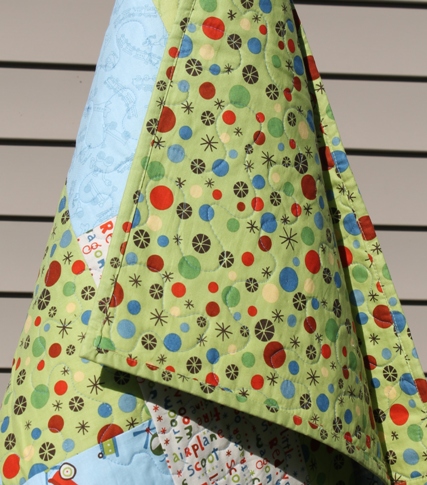
A Finish : Tifton Tiles Scoot Edition

Happy Monday!

I finally finished this long overdue quilt this weekend ... of course, it didn't take as long to finish as I thought it would.  In fact, I quilted it and bound it in one evening.  But I am glad to have it done and will be turning it over to its owner very soon and know it will be well-loved.  :-)

The pattern for this quilt is my "Tifton Tiles" quilt.  You can find the free tutorial for turning a stack of 9 FQs into a quick and easy to piece (and generously sized - approx 49" x 59") lap quilt here.  The original was a quilt that I whipped out for a Christmas present for my mother-in-law on a short time frame.


Like the original, I quilted this one with a meandering stitch all over.  This goes pretty fast and is easy to do.  :)

I did try something new on this one ... machine binding!  Ack!  I followed the tutorial from Rita at Red Pepper Quilts.  The tutorial is really good, but its definitely something I need to practice more.  I did cut my strips 2.5" wide and used a slightly wider seam allowance than 1/4", which I usually do.


I will definitely try this again ... but I will use a LOT more pins.  I felt like I did a really good job of stitching in the ditch on the front - almost all my stitches were fairly unnoticeable.  But I definitely missed some spots (as seen on IG) that I had to go back and restitch.  It's not horrible, but its not perfect.  But about 90% was caught in the stitching the first time so I feel pretty good about that for about 225" of binding!  I think more pins might help or using some Clover clips between (or instead of) pins.  Going slow, lots of pins, using an increased stitch length and a walking foot are my best tips for you.  I might quilt up some scraps sometime to practice the corners. With all that said, there are some quilts I will likely still hand stitch the binding on, but if I get a little closer to perfect on this technique, I could definitely see myself becoming a convert.  :-)

In other news, I did take this quilt to my guild meeting yesterday and then wimped out of show-and-tell after several people shared much more intricately pieced and quilted projects.  Totally silly of me I am sure.  But after the one woman who appliqued a tree and all sorts of animals native to Australia all over the BACK of her quilt, I felt a little simple with my kid-friendly, utilitarian quilt.  After thinking about that more today, I feel even sillier.  This quilt will be no less loved (and likely more used) than those "better" quilts.  I'm promising myself not to wimp out in the future.  :-)

Happy Sewing!  :-)

Quilt Stats: 
Pattern: Tifton Tiles by me (Chrissy Lux) (free pattern tutorial here)
Fabric: Scoot by Deena Rutter for Riley Blake
Size: 49" x 59"