

This tutorial is part of our Christmas in July series of tutorials.
I'm working with this fun bundle from Be Jolly by Deb Strain for Moda. I actually have two different projects from this bundle to share. In this tutorial, I am sharing a quick and easy table runner using the Bloc Loc HRT ruler and the blues from our Be Jolly bundle. (Check out my other tutorial with the red and greens.)

Project Requirements:
- You'll need four fat quarters and a half yard of background. I'm using prints from Be Jolly and a half yard of the Essential Dots White Red.
- You'll also need the "A" and "B" rulers from the Bloc Loc Half Rectangle Triangle (HRT) ruler set.
- 13 x 35" of batting
- Sewing machine and basic supplies
Cut the Blocks:
From each of three blue fat quarters, cut one 2.5 x 20" strip, cut two 2.25 x 20" strips, and one 3.5" square. From the 2.5" strip, subcut into four 2.5 x 5" rectangles. Reserve the two 2.25" strips for binding later.

Cut two of each rectangle in opposite directions as shown. You will need 4 triangles in each direction for each of the three prints.

From the background (red & white dot), two 2.5" x WOF strips. Subcut into twelve 2.5 x 5" rectangles.
Then cut two 4.5" x WOF strips. From these, subcut to get FOUR 4.5" squares, FOUR 4.5" x 7.5" rectangles and TEN 1.5 x 4.5" rectangles.

Make the Star Points:
Sew each blue triangle to a background triangle right sides together. Off set the triangles a little bit. Carefully press toward the blue print. (See more photos of this step in this tutorial here.)
Trim each HRT using your Bloc Loc. Be sure to use the correct ruler for each of the two types of triangles.

Place your ruler on top of the pieced unit and slide it toward the seam until it locks on. Be sure that your completed size (2" x 3.5") is included in the trim lines. Trim the top and side.

Then slide the ruler up along the seam until the trimmed edges are lined up with the lines for the correct size (2" x 3.5"). Trim the left and bottom sides. Repeat to trim all 24 units.

Next, join an "A" HRT unit and a "B" HRT unit together. Press seams open. Sew four pairs of each print.
Assemble the Top:

Start by sewing a 1.5 x 4.5" rectangle to two star point units from each of the three fabrics. Press toward the background sashing strip. These units will be used in Rows 1 and 3 below.

Using the diagram above, sew the pieced star points, center squares and background pieces into three rows as shown. Press toward the background when possible.
Once you've pieced the rows, join them together to complete the top.
Finish the Runner:

Prepare a backing using the 4th fat quarter and strips from the remaining fabric from the 3 prints used in the stars. Baste and quilt as desired.

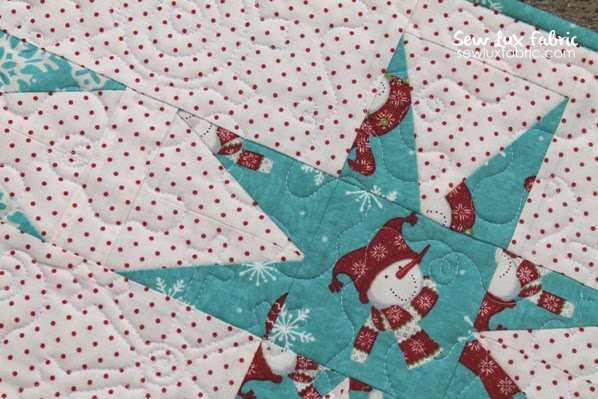
I did some meandering and loops as well as some free hand swirls and snowflakes. These smaller peieces are a great time to practice your free motion quilting!
Join the 2.25" strips from the 3 fat quarters to make a scrappy binding. Attach to the front and finish by hand or machine. (See more on binding here.)

Enjoy! :-) If you make one, please share the link! I'd love to see it!
Happy Sewing! :-)
Then slide the ruler up along the seam until the trimmed edges are lined up with the lines for the correct size (2" x 3.5"). Trim the left and bottom sides. Repeat to trim all 24 units.
Next, join an "A" HRT unit and a "B" HRT unit together. Press seams open. Sew four pairs of each print.
Assemble the Top:
Start by sewing a 1.5 x 4.5" rectangle to two star point units from each of the three fabrics. Press toward the background sashing strip. These units will be used in Rows 1 and 3 below.
(click to enlarge photo)
Using the diagram above, sew the pieced star points, center squares and background pieces into three rows as shown. Press toward the background when possible.
Once you've pieced the rows, join them together to complete the top.
Finish the Runner:
Prepare a backing using the 4th fat quarter and strips from the remaining fabric from the 3 prints used in the stars. Baste and quilt as desired.
I did some meandering and loops as well as some free hand swirls and snowflakes. These smaller peieces are a great time to practice your free motion quilting!
Join the 2.25" strips from the 3 fat quarters to make a scrappy binding. Attach to the front and finish by hand or machine. (See more on binding here.)
Enjoy! :-) If you make one, please share the link! I'd love to see it!
Happy Sewing! :-)


