Showing posts with label Christmas. Show all posts

Wednesday, November 16, 2016

Holiday Sewing : A QAL and a Stocking Tutorial

Hey there,

Today, Facebook reminded me it's been five years (OMG!) since I made my Scrappy Spiral Stocking.  I thought it would be fun to reshare with you all ... click here to see the tutorial.


Speaking of Christmas, we've started sewing the Vintage Holiday Quilt Along!


I am sewing up my quilt in Handmade by Bonnie & Camille ... we have some kits available here. :)


I started this weekend by cutting out all the block pieces and organizing them by similar block style.  This way I can sneak in some sewing quickly during the week after work... 


Speaking of which, my plan worked!  I had about 30 minutes yesterday and was able to sew 4 of the easiest ones together super quick.  I even finished one just to show how cute this will be!


Hope you will sewing along and share your quilts in progress with #vintageholidayqal2016
Happy Sewing! :-) 

Thursday, December 11, 2014

Merry Mug Rug Blog Hop - Pleated Tree


Hey there!  When Jennifer of Ellison Lane asked me if I'd like to participate in her Merry Mug Rug Blog Hop I was happy to oblige!

I thought it would be fun to make a smaller version of my pleated tree block.


The original block is 8" x 10", but you can make this block pretty much any size and even a little wonky if you like!  I'm including some pictures from my original tutorial below - feel free to check out the complete tutorial here


For the smaller version, I pleated a 4" x 10" strip off a layer cake square.  Your pleated piece should look something like this ...


In my original tutorial, I used a solid white background.  If you are using a print, you'll need to cut two 6" squares.  Cutting each one on opposite diagonal angles to get triangles for the sides.


Sew the sides on one at a time and then add a trunk section along the bottom.

Trim to the size you want and add a border if you like.  I chose to add a scrappy-ish border of red prints from Miss Kate by Bonnie & Camille.


I used a red layer cake square for the backing and self-binding of my little mug rug.  It's quick and simple!  Check out this tutorial here that shows how I do this binding technique.

Thank you so much for stopping by today!  If you make a pleated tree project, I'd love to see it!  Link it up or tag me @sewlux on Instagram.

Happy Sewing!  :-)

Monday, December 23, 2013

Crazy Christmas Sewing ...

The past week has been a complete whirlwind in my sewing room!  And with Christmas a little more than 24 hours away I am happy to say I am nearly done with my projects ... we'll see how much I can get done tomorrow.  :-)

Wanna see my week in review?

Two pillows - super easy - charm square friendly.  :-)  (The one on the right is made with just two prints - these Potluck prints from American Jane are awesome - I got this whole pillow from from just two quarter yard cuts.)

Some super cute snack mats for our friends' kiddos.  Love the Potluck Building Blocks print for these.  One yard gives you several of each letter in the alphabet!  A must stash in my opinion.  :-) These were totally scrap friendly and are 8 x 10.


I also whipped up a crazy Christmas sweatshirt for our tacky sweater Friday last week.  I started with my ruffled tree tutorial and then added embellishments before sewing it to my sweatshirt. I did take pictures as I went and will post a tutorial as a reference for later.


Then two more pillows to match the original Holiday Hustle quilt from last year.  I hear they look really great on the couch with their quilt companion.  :-)


I've also finished hand sewing the binding on my Aspen Frost Holiday Hustle AND pieced and quilted four quilts within the last week!  More about all those quilts soon.  For now ... Dude ... I'm tired!

Follow me on Instagram (@sewlux) to see if I get it all done!  :-)

Happy Sewing!  :-)

p.s. I will also work on getting a winner drawn for the HSJ BOM Link Up as well!

Thursday, December 12, 2013

Snowflake Pillow Tutorial


I've had this idea for several weeks and am so glad I was able to get this done!  It was super quick to whip up and I hope you'll have fun with it too.  The best part is that everyone's will be a little different - just like how snowflakes are all unique! 

If you are a Moda FQ Club subscriber with us, you received this kit free with your December bundle.  Need a kit?  We have a couple available here - while supplies last.

For this project, you will need the following: 
  • 1/2 yard Lightweight interfacing
  • 1/2 yard grey Ombre Fabric (I used V & Co's ombre solids
  • 1 FQ Snowflake tonal print * 
  • 1/4 yard grey solid * (Bella Solids Graphite)
  • 2 - F8 of white-on-white tonal prints (I used Muslin Mates)
* I decided to make a pillow with my kit and used the snowflake print for the pillow back.  If you prefer to make a mini, you can use the snowflake print for the backing and then bind with the 1/4 yard solid grey.  I didn't use the 1/4 yard solid as I did not add a binding to my pillow. 
You will need one 20 x 20 piece for the pillow front backing.


Cut a few different size squares of interfacing and white tonal prints.  Adhere interfacing to your white tonal prints - place the bumpy/rough side of the interfacing on the wrong side of your fabric and press it well.


Now, cut your snowflakes however you want to.  If you have older kiddos that you trust with scissors, this is a good time to get them involved.


From your half yard of the ombre stripe, cut three 3.5" wide x WOF strips.  Sub-cut each strip into twelve 3.5" squares.  Mix 'em up.


Stitch the 3.5" squares into six rows of six squares.  I just randomly pieced them back together, but feel free to be as deliberate as you like with your placement. :-)   Once you've pieced all the rows, arrange them as you like and press each row in opposite directions so they will nest well at the seams when you join the rows.


Piece the rows of 6 squares together into a 6 x 6 block square as shown below.


Make a quilt sandwich with your pillow top, batting, and some backing (I just used some plain solid since it won't be shown).  Then quilt as desired and trim to 18.5" x 18.5".


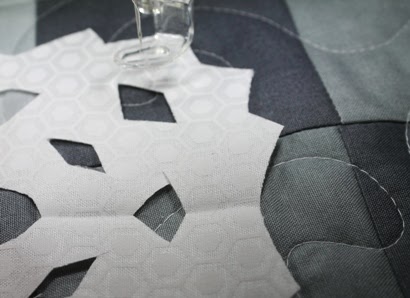
To attach my snowflakes, I just continued on with my free motion foot.  You could also use a walking foot, but it would be a lot of turns and in a small area, I felt comfortable enough with this foot to go around the cut outs free motion style. :-)  Stitch about 1/8" from the edges to secure the snowflakes.


It is kind of hard to see in this photo, but I went around the entire outside of the snowflake as well as around all the cut outs to secure it to the backing.


Continue until you have all the snowflakes arranged as you like. 


I made the back similar to the way I made the one in my last pillow tutorial.  I used some leftover ombre with the snowflake print FQ to piece the two flaps. 


I really love how this pillow turned out.  I think it would be fun to do a variation with a scrappy red background too!

If you make a snowflake pillow, I hope you'll share the link - I'd love to see it!

Happy Sewing! :-)

Monday, December 9, 2013

Christmas Came Early & Other Randomness

Hey there!

Wow ... so I didn't realize its been nearly 2 whole weeks since I did any blogging.  What the heck!?  Sorry about that, y'all.

But, despite all that I've been pretty busy working on a few different projects.  Christmas will be here incredibly soon and I am a little freaked out about my to-sew list.  Anyone else out there?

I am working on a fun new tutorial for you ... but with the crappy weather we've had the last couple of days I haven't been able to get a great photo of the finished project.  For now, I will show you a sneak peek with a Girl Scout's promise to have the tutorial available here in the next day or two ....


.... this turned out really awesome.  Just as I hoped!  If you are a monthly subscriber to our Moda FQ Club, you got a free kit for this project with your December bundle. :-)

The best part about this project was that I've gotten to try out some different stitchy things with my new BFF, the Bernina 710.


Yes, Christmas came early!  So far, I love her.  And I don't know how I've lived without a knee lift, an automatic cutter, the crazy awesome dual feed, and all that space.  (Note - I have been sewing on a great little Bernina (an Activa 210) for quite a few years and loved it!)  Please excuse all the crap in the background.  My sewing room is still a work in progress - or at least that is what I keep telling myself! ;-)

I also joined my sweet friend Christen's ornament swap and was pretty thrilled with my prototype over the weekend ....


I took this mess and started making a slew of these cute little hoops assembly-line style.


Still need to do a few things to finish them up and then I will be mailing them off to my fellow swappers.  Hope they like them.

In shop-related news, we're having a precut sale!  Grab some up and whip up a last minute project quick!


No coupon code is necessary - discount will be taken once items are added to your shopping cart.

We also rearranged our Sale Fabric page so its easier to see what's been marked down.  Check it out.

I think that is it for now!  Hope you have a wonderful, sewing-filled week!

Happy Sewing! :-)

Thursday, November 14, 2013

Winter's Lane Patchwork Pillow

Hey there friends!

I promise I haven't forgotten about this blog.  Life outside of Sew Lux has been a little busier than I'd like the past couple of weeks, but there is light at the end of the tunnel.  :-)

I did want to stop in and share this awesome pillow tutorial that our friend Tessa at The Sewing Chick posted with one of our Winter's Lane bundles.


First, you really can't go wrong with the Winter's Lane collection.  It's pretty much gorgeous.  We do have some yardage and bundles left, but they probably won't last too much longer!  (And its on sale!) 

The pillow Tessa made uses appliqued letters and some simple patchwork.


Go check out her post here and say hello.

Happy Sewing!  :-)

Monday, September 16, 2013

Who's Ready for Christmas?

Finally ... some real sewing has taken place around here!  :-)  Wanna see?

So, my Uphome girls (a group of us that met at Sew South) all decided to do a traveling medallion.  Which is super fun.  I had a hard time deciding on my theme at first since I am doing another medallion in all pink and polka dots and things I love!  (Which by the way, its not too late to sign up for it!)

So ... Christmas it is!  I think this allows for a lot of fun with the borders as well.  Can't wait to see what my girls add to this one.  :-)


I made my center block using mostly prints from the Modern Mix Christmas collection along with this cute Alexander Henry Christmas owl print.


I used the Ferris Wheel block from Elizabeth Dackson's project in Quilty magazine.  I did draw up some paper piecing patterns for the corner blocks in EQ7 though since the templates were just too fiddly for me.  Of course, my HST and 3x6 flying geese Bloc Locs were really helpful as well.  :)

I sent along some extra scraps and a few other prints from my stash with it.


Can't wait to see how this turns out!

Happy Sewing!  :-)

Wednesday, July 24, 2013

Christmas in July Sewing Challenge : In From the Cold

Hey again!  I had the pleasure of sewing along with some of my fellow Sew Southers (and Christmas in July Challengers) this past weekend, including Christen of Love by Hand (host of the Christmas in July Sewing Challenge), Sarah of Stitching and Bacon (who made these cute trees) as well as Tessa of The Sewing Chick.

Photo courtesy of Tessa at The Sewing Chick

While we were hanging out, stitching, and laughing this weekend, we also got a sneak peek at this awesome project that Tessa made with the In From the Cold bundle.  And I just wanted to make sure you didn't miss it!  Check out her tutorial here.  Her work is always beautiful and the tutorial is beautifully photographed and easy to follow.  You'll love it, I promise.  

Happy Sewing!  :-)

Tuesday, July 23, 2013

The Holiday Hustle Quilt Along

Hey y'all!

If you're like me, you probably find yourself stitching until the minute before Santa's Sleigh comes through each year.  This year, I am on a mission to stitch more early so I can relax and enjoy the holiday with family and friends.  (We'll see how that goes!)


Anyway, last year I whipped up my Christmas Joy quilt in what I'm calling my "Holiday Hustle" pattern.  The name pretty much says it all ... a holiday quilt whipped up in a hustle.  Of course, you can make this quick and easy-to-piece charm pack quilt in any fabric collection.

Want to stitch along with me?  Stitch along and link up your finished project at the end for a $40 gift certificate.  Here are the dates you should mark on your calendar:

  • Thursday, July 25th - Quilt Details & Supplies
  • Thursday, August 1st - Piecing the Blocks
  • Thursday, August 8th - Adding the Borders
  • Thursday, August 15th - Quilting & Binding
  • Saturday, August 31st - Linky Closes for Finished Quilts & a Winner is Drawn!

Can't wait til Thursday for the deets?  Order a kit in either In From the Cold or Aspen Frost here (and on sale through 7/27!).

Happy Sewing!  :-)

Thursday, July 11, 2013

Christmas in July Sewing Challenge : Aspen Frost Projects

Hey y'all!  I wanted to stop in and share the great projects that have been shared in the Christmas in July Sewing Challenge hosted by Christen at Love by Hand.


Christen contacted me several weeks ago about sponsoring the challenge and so we put together three FQ bundles (Aspen Frost, Winter's Lane, and In From the Cold) for the challenge. For each collection, two different bloggers will share a fun tutorial for the challenge. This week, Aspen Frost was up.


Christen made this awesome Present Placemat.  Check out the details and her tutorial here.


And Sarah at Stitching and Bacon made these cute Tree Trivets.  Her quick and easy paper piecing project tutorial can be found here.

I think both projects turned out so cute!  And its even more fun that I know both Christen and Sarah in real life.  We had a blast sewing together at Sew South and we'll even be sewing together next weekend with some other fellow Sew Southers!  :-)

You can also get involved with the challenge by entering your own project!  Read all the details here.

All the bundles for this series are available now and are 10% off through 7/14/13.  Stay tuned ... Winter's Lane challenge projects are up next!  :-)

Happy Sewing!  :-)

Monday, July 8, 2013

Curated Christmas Sale

Hey there!

I am really excited about our newest Curated Collections ... all holiday collections!  These Christmas bundles are so fun.  Three of them are being used in the Christmas in July Sewing Challenge Series and the fourth (bottom right) is one I just had to put together for the fun of it!

Aren't they pretty!?  I can't decide which one I want to sew with ...
maybe some of all of them!


These four Christmas bundles as well as our newest Perle Signature Samplers are all 10% now through Sunday, 7/14/13 - no coupon code is needed.  Prices will discount once the item is added to your cart.

Happy Sewing!  :-)
Saturday, December 29, 2012

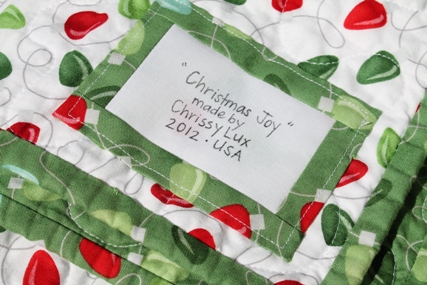
Christmas Joy Quilt

Well ... we've dug our way out of the wrapping paper, bags, and assorted bows and tissue.  I still haven't taken down the trees and decorations yet, but maybe tomorrow.

I did finish my quilt the day after Christmas and here it is ...


It seems really small when my giant, 6'4"husband holds it up.  But it is a decent size lap quilt. :-)


I decided to call it "Christmas Joy" instead of what I will be calling the pattern ("Holiday Hustle") when I get around to doing a tutorial for this one.  :-)


This quilt was easy ... and uses one charm pack, some Bella white solid for sashing, and Joy yardage for the border, binding, and backing.


I just did some free motion stippling on this one and it washed up and crinkled nicely.  :-)

I am happy to report it was very well received and even warranted a "best gift ever" comment.  Love it when that happens.  :-)

Happy Sewing!  :-)

Saturday, December 22, 2012

Better Under Pressure ...

Hi again ... world's best procrastinator here to share my latest last minute project!  LOL

I've been hemmin' and hawin' about what to make and today it was time to just go for it.  I have two-and-a-half of five projects I'd really like to complete by Christmas done, but we'll see how much I can get done tomorrow!  This is the biggest one in progress ...


My Joy charm pack put to good use after several sketches for the design.


All the blocks are now pieced.  Just have to run over to the shop to get more fabric in the morning - need sashing and borders and backing.

Anyone else crazy enough to try and crank out a quilt between now and Christmas!?  I will just keep telling myself that I just work better under pressure.

Happy Sewing!  :-)