Showing posts with label TB Sampler 2. Show all posts

Tuesday, December 22, 2015

Thimble Blossoms Sampler - Sashing & Finishing

Hey there!

I finally finished my quilt top and have the instructions for sashing ready for you!


As soon as it stops raining, I will get some good photos of the completed top and add them to this post.  For now, you can access the sashing & finishing instructions here.

There are a few kits left available here in our shop if you need one.

Happy Sewing!  :-)

Wednesday, November 18, 2015

Thimble Blossoms Sampler Week 7 - Nantucket

Hi there!

I am finally back with the last block installment in this sampler project. This week, we are using the Nantucket pattern.  I've heard a few of you on Instagram share that this block is a little intimidating.  And while it certainly does look difficult, you can totally do it!  I photographed a few steps to share some tips with you all.


Before I go into the tips, I will say that this block is a little on the tedious side as you really need to pin carefully in each step.  I would consider myself a confident piecer, so I didn't draw the lines as Camille suggests in the pattern. So, if this is a little scary, I would suggest you definitely do that AND maybe make a test 1/4 of a block to get more comfortable with this block.

First ... you are going to need some pins! The finer the better.


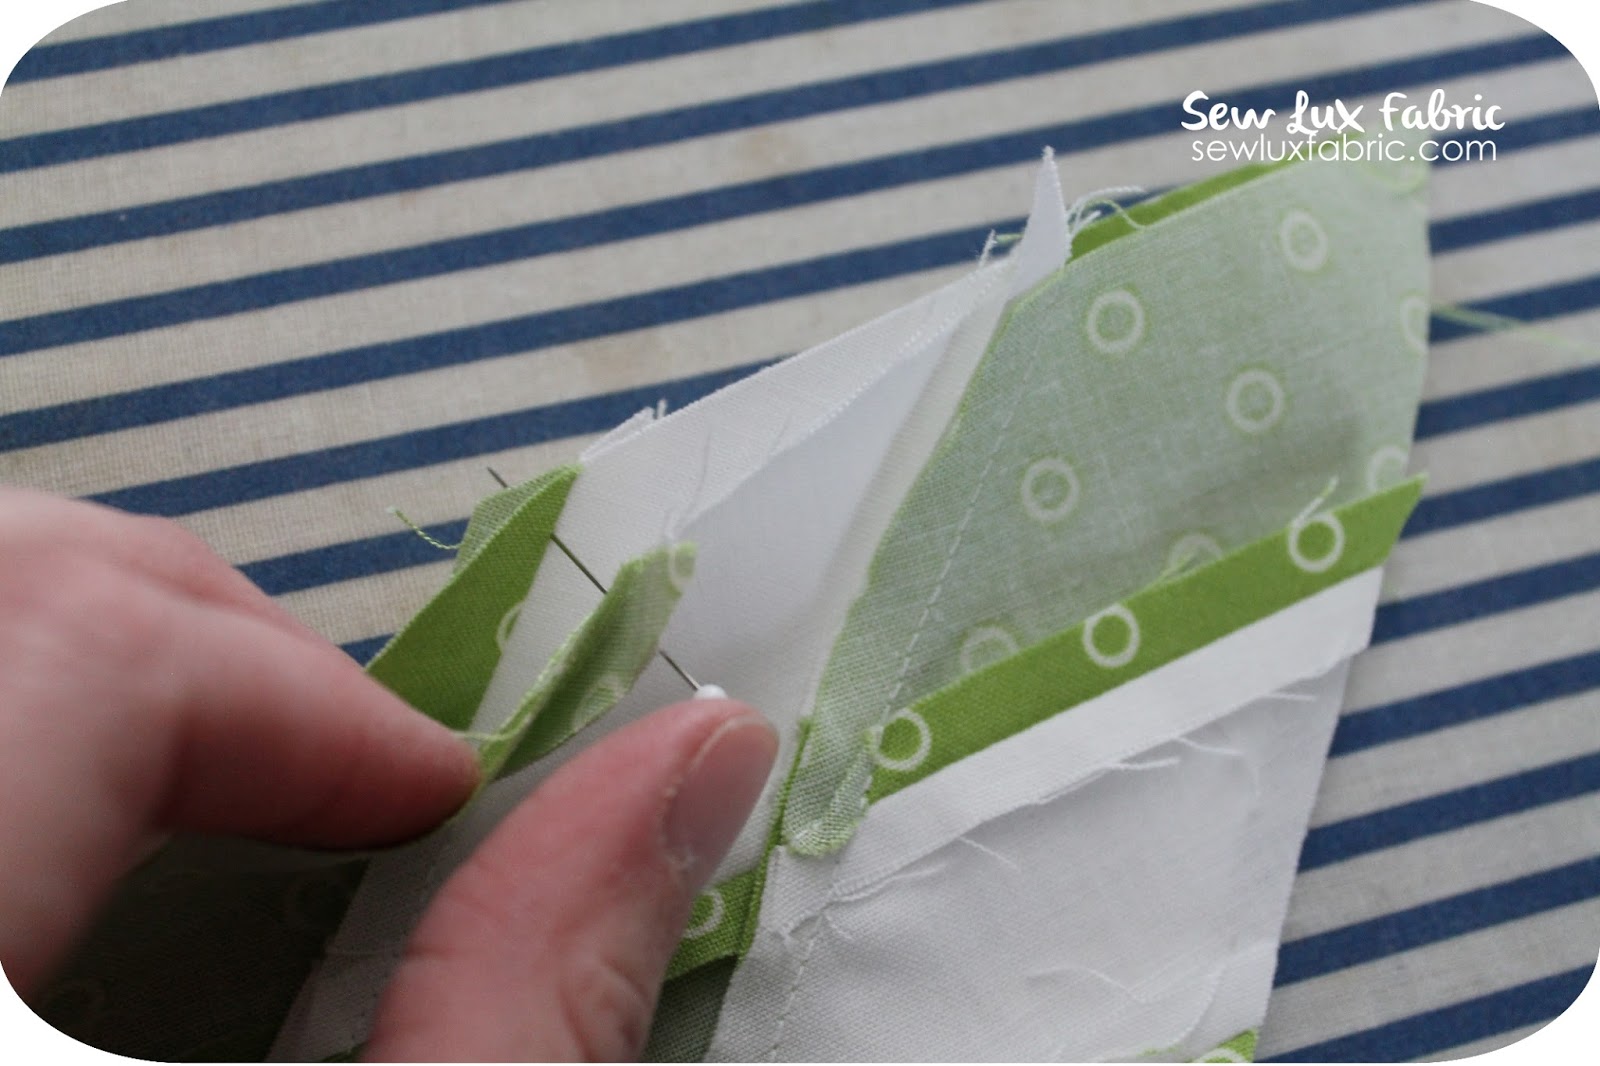
I used pins in all the intersections as I pieced the strips and completed strip sets together.  Put the pin through each unit at 1/4" and this will help line everything up nicely.  (Remove pins as you sew!)
Side note:  be really gentle when pinning ... you don't want to pull or tug the fabric a lot since there is a lot of bias going on here!


Continue pinning as you join the larger pieced triangle units into the quarter blocks.  I used pins at every intersection as well as in the background triangles.


The pattern suggests that you may need to trim these quarter units.  I chose to do so here.  You can use the diagonal lines your mat if you have them to assist you, if needed. I didn't need to trim much ... especially in my 2nd and 3rd blocks where I was much more careful in handling and pressing my units.


Continue pinning when you join the quarter units together.


You'll make two halves of the block.  And I pressed the seams between the quarter units in opposite directions so they would nest when I joined the two halves.


The next thing I want to share has to do with pressing ... and I mean "press" as opposed to "iron." All the block pieces have bias edges, which means that they will stretch.  So you want to be very careful about pressing these blocks - in ALL stages of construction.  Sometimes I "iron" and really force fabric where I need it to go.  Here we want to press... so up and down (vertically) with the iron as opposed to doing more heavy-handed sliding of the iron on the seams, if that makes sense.  I also chose not to use steam here to try and minimize stretching & distortion.

Another tip related to pressing is to finger press seams before you press them with the iron.  I usually "set the seam" quickly with an iron and then gently press the seam open with my fingers before getting the iron involved.  This just helps to make sure I don't work the fabric too hard with my iron.
(My good friend Lee at May Chappell calls this "married seams" in her glossary of important terms.)


Overall, I am happy with how these blocks turned out.  They are not completely perfect, especially this first one that I made ....


You can see where I ended up trimming a little too much - which was possible because I had ironed a little more than I had pressed. :/


I will lose some points on the outer edge of my block.  BUT ... in general, I think they turned out pretty good and this quilt is for me.  Not for a show.  But for me to enjoy and once it is quilted I don't think it will be super noticeable unless you really look. So I decided to live with it. :-)


I can't really decide which I like best.  But I love the floral backgrounds.  I specifically chose these for this block in the kit because the seams would be less noticeable in the background.


Well, there you have them!  Good luck!  If you need help, just tag me on IG @sewlux and use #TBScrappySamplerQAL.

I will be back in a couple of days to share the layout process.  We'll start in the middle and work our way out, so hang tight on that step!

Happy Sewing!


Sunday, November 8, 2015

Thimble Blossoms Sampler Week 6 - Clambake

Hi again!

I am finally back with the latest in this sampler project.  I am so sorry for the delay!  But without further adieu, here it is ...

This week, we are using the Clambake quilt pattern.  We'll be making two rows to go under the Flower Patch & Summerville Houses.


For the top row, you'll use 9 full clams.  And for the bottom row, you'll use 8 full clams and cut the 9th in half to put on each end as you can see in the image above.


For the bottom row, you'll use white (or whatever you are using for the background) to create the curves in the clamshells.  I found it helpful to use my design wall to lay out my prints and would encourage you to do so also (the floor would also work if you don't have a design wall).


This strip is slightly longer than we will need, but we will trim it down in the final assembly.


I really love this Clambake pattern - its simple and easy to piece with a little planning.  I really want to mix some collections or maybe even a fun Christmas quilt with many of the prints I have collected over the years.

Thanks again for hanging in there with me!  The last set of blocks (Nantucket) will be shared this Friday and I've updated the original schedule here.

Happy Sewing!  :-)

Monday, October 19, 2015

Thimble Blossoms Sampler Week 5 - Flower Patch

Hey there!

I am running a little late again with my sewing (sorry about that!), but I am happy to be popping in to share this really fun (and ginormous!) block for this week's installment in the Thimble Blossoms Sampler.


This week, we're sewing one complete Flower Patch block, which is four units sewn together.  This block includes some fusible applique and I did a small zig zag stitch to secure mine to the foundation squares.  Then made sure to pin the intersections of points so they'd match up nice and pretty!

For the next week, we'll be making Clambake blocks and I wanted to check my layout a little in thinking about distributing colors throughout my quilt.  So, I thought I'd take this opportunity to show you how things are looking and also give you a variation or two for the top row to make your quilt your own, if you like!

First, let me apologize for the sun & wind that made these photos not what I hoped ... ;-)


But anyway ...  this is the original plan with the nine patch blocks on the ends and the three stars in the middle.


You can also move the nine patches between the stars, so it alternates blocks across the top.


And finally, you can sew the nine patches together in pairs and alternate between the stars like this ... 


I am leaning toward option two, but may still change my mind.  Which one do you like the best?

That's all for now!  I am headed to Quilt Market on Wednesday and will do my best to get my Clambake section pieced before I leave, but it may get posted early next week.

If you are just joining along, learn more about the QAL here.  (And remaining kits are now on sale while they last!) 

Happy Sewing!  :-) 

Sunday, October 11, 2015

Thimble Blossoms Sampler Week 4 - 9 Patches

Welcome back!  I hope you are having fun sewing along on this QAL ... How did you did with your house blocks last week?

This week, we are making the last of the blocks we will need from the Summerville pattern by Camille at Thimble Blossoms.


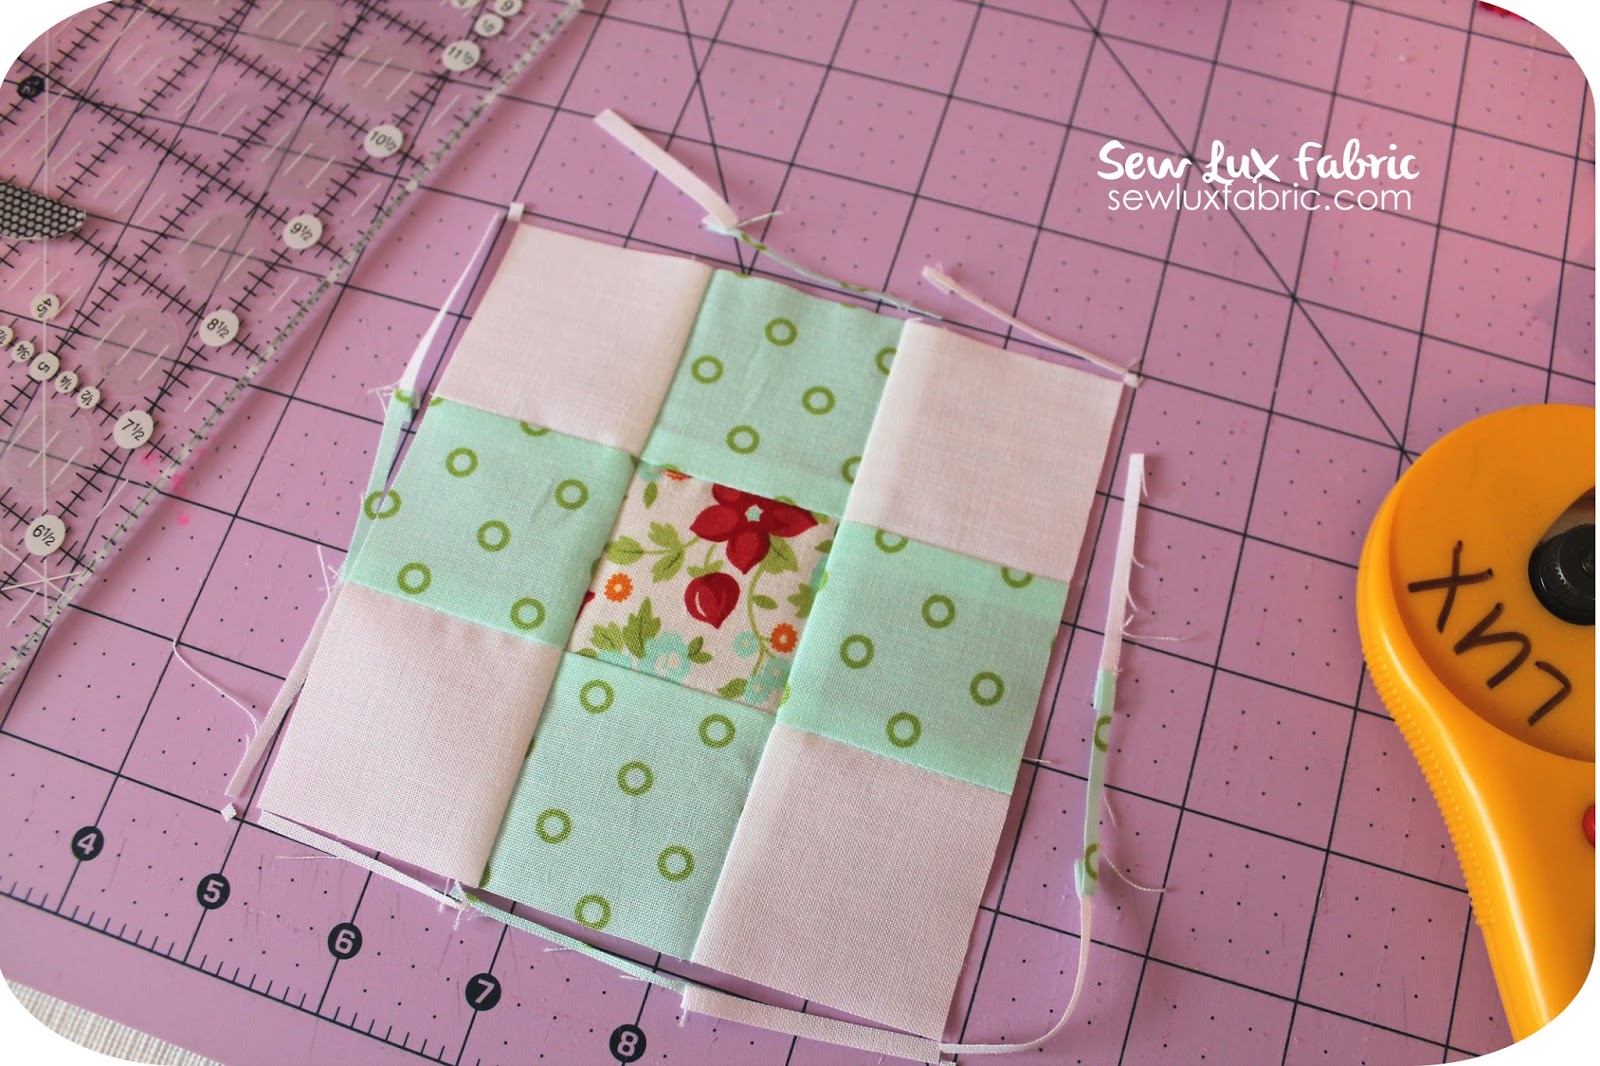
These little 9 patch blocks are point come together quickly.  You can see that I elected to use low volumes in the outer corners and replaced the middle background square with another print for some variety.  Feel free to make these however you want! 


One thing I wanted to make sure to point out in the pattern is that you need to trim the 9 patch before adding the corner pieces to complete the block.  The pattern calls for this (I may have missed it with my first block!) and you will have a hard time getting your finished block the correct size without cutting off points if you don't.  For me, it was about a 1/8" off each side.  


You will need 8 blocks total.  I haven't sewn mine together yet since I may switch up the layout a little on the top row of the quilt (more about that later). 

I hope you are having fun sewing along.  Share a link or tag me on Instagram (@sewlux) and use #TBScrappySamplerQAL so I can see your little neighborhood!

Have a great weekend and I will see you next Friday with the Flower Patch block. :)

Happy Sewing! :-)

Friday, October 2, 2015

Thimble Blossoms Sampler Week 3 - Houses

Welcome back!  I hope you are having fun sewing along on this QAL ... How did you did with your star blocks last week?

This week, we are still making our way through all the great blocks in the Summerville pattern by Camille at Thimble Blossoms.

If you are using our kit and making these from layer cake squares, please be sure to refer to the instructions included in the kit for cutting the main body of the house from one layer cake square.


These house blocks come together pretty easily, especially if you chain piece to make several at once.


I tried to use most of the colors from the layer cake throughout my houses and I also tried to think about patterns that would be ok with seams in them for the roof parts especially.  (For example, the orange peel could look a little wonkly with a seam in the middle, but the florals hide the seams a little better.)


Is it bad that now I want to make a whole quilt of these house blocks?!


They are just too cute?! :-)

I hope you are having fun sewing along.  Share a link or tag me on Instagram (@sewlux) and use #TBScrappySamplerQAL so I can see your little neighborhood!

Have a great weekend and I will see you next Friday with the next set of blocks!

Happy Sewing! :-)


Friday, September 25, 2015

Thimble Blossoms Sampler Week 2 - Stars

Happy Friday!

Who's ready to sew up some easy star blocks this weekend?

This week, we're still working with the Summerville pattern (available here) for our Thimble Blossoms Sampler QAL.

These star blocks are very easy (and quick!) to sew.  I chose to make them a little scrappy, but you can certainly make them all one color if you want depending on the fabrics you are using.


I put the pinks & reds opposite of each other on my star, as well as the cool colors (aqua and green) across from each other.


To get nice points with half square triangles (HST), I always sew a little big and them trim to size. This helps with accuracy when you join them together into a larger block.  You can use a ruler, but I also love a Bloc Loc for this!


Here are all my pretty blocks awaiting their quilt top neighbors!


Are you sewing with me?  Share a link or tag me on Instagram (@sewlux) and use #TBScrappySamplerQAL

Have a great weekend and I will see you next Friday with the next set of blocks!

Happy Sewing! :-)
Friday, September 18, 2015

Thimble Blossoms Sampler Week 1 - Clover Blocks

Hey everyone!  I am really excited that it is Friday because we are kicking off the first week of sewing in the Thimble Blossoms Sampler Round 2!  

I want to start this week by sharing that you should plan ahead with your cutting if you are using our kit or a layer cake for the bulk of your blocks. 

(sorry for a couple of crappy phone pics here!) 

I used the cutting guide (available here) that we included with our kits to plan out where I would use each fabric.  There is some flexibility, even with using a layer cake, but you do have to plan ahead a little to get all the cuts and distribute the colors throughout the quilt.  You can see below how I mapped things out a little before starting.  Be sure to read all of it and feel free to let me know if you have questions. :-)


Ok .. now that we have that out of the way, let's talk about this week's sewing!  We'll be using the Summerville pattern for the next four weeks.  You can download the pattern from Camille here.


We're making what I will call "clovers" this week, which are made up of four of the border blocks, just arranging them a little differently to make a four leaf clover or chunky X block.  These are quick and simple to sew together - perfect for our first week! :)


One of the reasons we are making these first is that we need to cut these squares out early from the layer cake (refer to cutting guide) so we'll have pieces big enough.  You'll see as we sew along that the leftovers of these layer cake squares will appear all of the place in my quilt top as well.


I did choose to make each of these in a different color, but you can do them however you want!  It's totally up to you!


I found it helpful to pin those intersections where the white background corner pieces met to try and make sure things lined up nice as I sewed the four units together.


Hello Darling is such a fun and pretty collection!  I am really excited for how this quilt will turn out!

Are you sewing with me?  Share a link or tag me on Instagram (@sewlux) and use #TBScrappySamplerQAL

Have a great weekend and I will see you next Friday with the next set of blocks!

Happy Sewing! :-)