Tuesday, December 31, 2013

Adios 2013 & Quilting Community

As we are just a few hours away from closing the book on 2013, I wanted to share with you about a recent quilt finish and perhaps one of the most important quilts I've made this year.

My husband and I joke that watching his alma mater's football games is like an emotional roller coaster ride. And in thinking about 2013, I would sum the year up as a long roller coaster ride full of loops, and turns, and tunnels. As with every roller coaster, there are ups and downs.  There were definitely some joys along the way, but I'm glad to get off this ride!  :-)

This year, I lost both an aunt and a coworker to cancer.  Both women fought hard and each left behind husbands and two children that loved them dearly.


Following the loss of our coworker, Michelle, this Fall, I felt compelled to make a quilt for her two girls who are just five and one years old.  Michelle's battle was little more than a year and half, but she fought her breast cancer with dignity and a positive attitude that I don't know that I would have been able to muster up. She was an example to all of us at work.  From her, I've learned more about perspective and hope to go through 2014 being more conscious of that - knowing that while things may not always be fun, but there is so much to be grateful for.


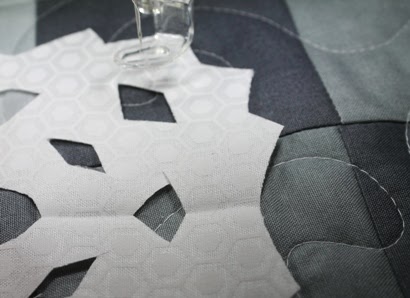
I had my coworkers help me piece these blocks in the school's sewing classroom.  That was certainly an experience - as I promised them all they could do it, saying "just put your foot down and drive straight." Well, the blocks weren't perfect, but I made them all work.

I chose the cross block to honor Michelle's faith and then used bright colors as she was always a happy & positive person.  And I wanted this quilt to be fun for her little girls, so bright and dotty was in order.  (And who are we kidding ... dotty is always in order in my projects! :-)


The coworkers who wanted to sign the quilt all signed squares, which I pieced into the back.


It was really fun to see my colleagues light up and say "that's my block" upon finishing this one and sharing it with them before it was gifted.

I had a coworker who is close to the family deliver this for me.  And I hope it was well received and will be enjoyed by her girls for many years to come.


This quilt represents community for me.  And I'm happy to say that one of the bright spots in my year has been finding my own "quilt community" this year.  I've made some awesome friends in fabric who I can laugh with, cry with, and unpick seams with.  :-)  I'm looking forward to a new year of community, creativity, and perspective with you all.

Happy New Year!


Monday, December 30, 2013

Year End Clearance

We're clearing out space for new bolts in 2014 with a clearance sale!


Save an extra 15% off all sale collections.  You can see them all here - we have over 400 items on sale and over 70 last chance/bolt ends!

Sale ends 1/2/14 - no coupon code is needed as the discount will be applied automatically once items are added to the cart.

Happy sewing!  :-)

Hop Skip Jump BOM Linky Winner

So I am wayyyyy overdue posting this linky winner, but I'd like to congratulate Maureen on winning our halfway point Hop Skip Jump Linky Winner.


Maureen, I'll be sending you a $20 gift certificate to our shop.

Here's a sneak peek at our next block pattern - coming to inboxes January 1st!


Happy Sewing!

Ladie's Night Challenge Update


In case you missed it, we extended the deadline for the Ladie's Night Challenge link up until tomorrow (Dec 31st).  Don't forget to add your project link on this post here

Happy Sewing! :-) 

Monday, December 23, 2013

Crazy Christmas Sewing ...

The past week has been a complete whirlwind in my sewing room!  And with Christmas a little more than 24 hours away I am happy to say I am nearly done with my projects ... we'll see how much I can get done tomorrow.  :-)

Wanna see my week in review?

Two pillows - super easy - charm square friendly.  :-)  (The one on the right is made with just two prints - these Potluck prints from American Jane are awesome - I got this whole pillow from from just two quarter yard cuts.)

Some super cute snack mats for our friends' kiddos.  Love the Potluck Building Blocks print for these.  One yard gives you several of each letter in the alphabet!  A must stash in my opinion.  :-) These were totally scrap friendly and are 8 x 10.


I also whipped up a crazy Christmas sweatshirt for our tacky sweater Friday last week.  I started with my ruffled tree tutorial and then added embellishments before sewing it to my sweatshirt. I did take pictures as I went and will post a tutorial as a reference for later.


Then two more pillows to match the original Holiday Hustle quilt from last year.  I hear they look really great on the couch with their quilt companion.  :-)


I've also finished hand sewing the binding on my Aspen Frost Holiday Hustle AND pieced and quilted four quilts within the last week!  More about all those quilts soon.  For now ... Dude ... I'm tired!

Follow me on Instagram (@sewlux) to see if I get it all done!  :-)

Happy Sewing!  :-)

p.s. I will also work on getting a winner drawn for the HSJ BOM Link Up as well!

Monday, December 16, 2013

New Precuts

Just a quick post tonight to let you know what's new in the shop! 


Precuts from all these great collections and more!  Available while supplies last!

Happy Sewing! :-) 

Thursday, December 12, 2013

Snowflake Pillow Tutorial


I've had this idea for several weeks and am so glad I was able to get this done!  It was super quick to whip up and I hope you'll have fun with it too.  The best part is that everyone's will be a little different - just like how snowflakes are all unique! 

If you are a Moda FQ Club subscriber with us, you received this kit free with your December bundle.  Need a kit?  We have a couple available here - while supplies last.

For this project, you will need the following: 
  • 1/2 yard Lightweight interfacing
  • 1/2 yard grey Ombre Fabric (I used V & Co's ombre solids
  • 1 FQ Snowflake tonal print * 
  • 1/4 yard grey solid * (Bella Solids Graphite)
  • 2 - F8 of white-on-white tonal prints (I used Muslin Mates)
* I decided to make a pillow with my kit and used the snowflake print for the pillow back.  If you prefer to make a mini, you can use the snowflake print for the backing and then bind with the 1/4 yard solid grey.  I didn't use the 1/4 yard solid as I did not add a binding to my pillow. 
You will need one 20 x 20 piece for the pillow front backing.


Cut a few different size squares of interfacing and white tonal prints.  Adhere interfacing to your white tonal prints - place the bumpy/rough side of the interfacing on the wrong side of your fabric and press it well.


Now, cut your snowflakes however you want to.  If you have older kiddos that you trust with scissors, this is a good time to get them involved.


From your half yard of the ombre stripe, cut three 3.5" wide x WOF strips.  Sub-cut each strip into twelve 3.5" squares.  Mix 'em up.


Stitch the 3.5" squares into six rows of six squares.  I just randomly pieced them back together, but feel free to be as deliberate as you like with your placement. :-)   Once you've pieced all the rows, arrange them as you like and press each row in opposite directions so they will nest well at the seams when you join the rows.


Piece the rows of 6 squares together into a 6 x 6 block square as shown below.


Make a quilt sandwich with your pillow top, batting, and some backing (I just used some plain solid since it won't be shown).  Then quilt as desired and trim to 18.5" x 18.5".


To attach my snowflakes, I just continued on with my free motion foot.  You could also use a walking foot, but it would be a lot of turns and in a small area, I felt comfortable enough with this foot to go around the cut outs free motion style. :-)  Stitch about 1/8" from the edges to secure the snowflakes.


It is kind of hard to see in this photo, but I went around the entire outside of the snowflake as well as around all the cut outs to secure it to the backing.


Continue until you have all the snowflakes arranged as you like. 


I made the back similar to the way I made the one in my last pillow tutorial.  I used some leftover ombre with the snowflake print FQ to piece the two flaps. 


I really love how this pillow turned out.  I think it would be fun to do a variation with a scrappy red background too!

If you make a snowflake pillow, I hope you'll share the link - I'd love to see it!

Happy Sewing! :-)

Tuesday, December 10, 2013

Ladies Night Sewing Challenge Link Up


 It's time for the Ladies Night Sewing Challenge Link Up!

Check out the original post here for more info on the Challenge.  But here are the basics again ...

The Challenge Rules: 

Make a project with one of three Ladies Night Bundles (or use your stash to build your own bundle in one of the three color schemes). 


Link up your project here on our blog by December 23th December 31st
 *Project must meet the following guidelines:  if you are making a quilt, the top must be complete to link up.  If you are making anything else - tote, pouch, pillow, etc your project should be completed.  No blog?  That is a-ok!  You can link a Flickr image. One link per colorway per person.

We will announce three winners on December 26th January 4th.  We'll choose three winners randomly, who will each win one of the following:   
  • A pretty (and awesome) personalized pencil pouch pieced and stamped by Sarah


I *think* I've finally decided what to do with my bundle!  Check out what Sarah & Lee have been up to ... I hear they are planning to post some progress pics today. :-)


Don't forget to tag your Instagram pictures with #isewwithsewlux and #ladiesnightchallenge so we can check out your awesome projects!

Happy Sewing!  :-) 

Monday, December 9, 2013

Christmas Came Early & Other Randomness

Hey there!

Wow ... so I didn't realize its been nearly 2 whole weeks since I did any blogging.  What the heck!?  Sorry about that, y'all.

But, despite all that I've been pretty busy working on a few different projects.  Christmas will be here incredibly soon and I am a little freaked out about my to-sew list.  Anyone else out there?

I am working on a fun new tutorial for you ... but with the crappy weather we've had the last couple of days I haven't been able to get a great photo of the finished project.  For now, I will show you a sneak peek with a Girl Scout's promise to have the tutorial available here in the next day or two ....


.... this turned out really awesome.  Just as I hoped!  If you are a monthly subscriber to our Moda FQ Club, you got a free kit for this project with your December bundle. :-)

The best part about this project was that I've gotten to try out some different stitchy things with my new BFF, the Bernina 710.


Yes, Christmas came early!  So far, I love her.  And I don't know how I've lived without a knee lift, an automatic cutter, the crazy awesome dual feed, and all that space.  (Note - I have been sewing on a great little Bernina (an Activa 210) for quite a few years and loved it!)  Please excuse all the crap in the background.  My sewing room is still a work in progress - or at least that is what I keep telling myself! ;-)

I also joined my sweet friend Christen's ornament swap and was pretty thrilled with my prototype over the weekend ....


I took this mess and started making a slew of these cute little hoops assembly-line style.


Still need to do a few things to finish them up and then I will be mailing them off to my fellow swappers.  Hope they like them.

In shop-related news, we're having a precut sale!  Grab some up and whip up a last minute project quick!


No coupon code is necessary - discount will be taken once items are added to your shopping cart.

We also rearranged our Sale Fabric page so its easier to see what's been marked down.  Check it out.

I think that is it for now!  Hope you have a wonderful, sewing-filled week!

Happy Sewing! :-)

Monday, November 25, 2013

Modern Maple Leaf Pillow Tutorial


Thanksgiving is just a few days away and this weekend I whipped up a pretty maple leaf pillow to add to my fall decor in the living room.  If you shopped with us during our Customer Appreciation weekend the earlier this month, you got a kit for this in your goody bag!  :-)


Here's what you need for this 18" square pillow: 
1 FQ backing (kits have one of an assortment of prints)
1 FQ Bella Snow (or other neutral for background)
4 F8 of Bella Solids (I am using Mustard, Clementine, Chocolate & Boysenberry)
20" square of batting & scrap for back of pillow front for quilting

Kits for this project are available here.  :-)

First, I want to point out that this pillow is definitely inspired by the Modern Maples craze!  I also made a basic maple leaf block tutorial some time ago here.

For each of the two smaller leaves, you need to cut the following:

  • THREE 2.5" squares of leaf color 
  • TWO 3" squares of the leaf color
  • ONE 1" x 5" strip of the leaf color
  • TWO 3" squares of background
  • TWO 2.5" squares of background
  • ONE 3.5" x 6.5" rectangle of background
  • ONE 3.5" x 9.5" rectangle of background

For each of the two larger leaves, you need to cut the following:
  • THREE 3.5" squares of leaf color 
  • TWO 4" squares of the leaf color
  • ONE 1.25" x 5" strip of the leaf color
  • TWO 4" squares of background
  • TWO 3.5" squares of background
Let's get sewing!  Instructions are for smaller leaf block (with larger block measurements in parentheses). Use a 1/4" seam allowance throughout. 

First, cut one of the 2.5" background (or 3.5") and cut it in half on the diagonal.  Sew the 1" x 4" strip (1.25" x 5") between the two background triangles. Press toward background.


Trim to 2.5" square (3.5" square).


Use the two 3" leaf color and the two 3" background squares (4" and 4") to make FOUR half square triangle units using your favorite method.  (I usually cut them in half on the diagonal and sew them together.  You can also draw a line down the diagonal and saw 1/4" on either side of the line then cut on the line.) Trim all four blocks to 2.5" (3.5").

Next, lay out your leaf block and sew together into three rows:


Top row:  background + HST unit + HST unit
Middle row:  HST + color + color
Bottom: HST + color + stem
* Small leaf block all squares in the 9-patch are 2.5" pre-sew.  They are 3.5" pre-sew in the larger leaf block.

For the two smaller blocks, attach the 3.5" strips to two adjacent sides as shown to make it 9.5" square. (You may wish to layout our pillow to determine which sides to sew to if you want the leaves pointing in certain directions.)


Sew the leaf blocks together like this:


Baste and quilt as desired.  I chose to create a bark/wood grain pattern with my quilting.  And I really like how it turned out.


For the back, I cut my fat quarter in half lengthwise (two 9" x 21" strips) and then used some of my leftovers to create a pieced strip about 5" tall to add to one of the backing pieces so that the top and bottom of the pillow back would overlap by a few inches.  (See more about how to make and attach the backing to a pillow at the end of this tutorial here.)


The back of the completed pillow.  :-)


Hope you enjoyed this tutorial!  This is a quick and easy project and would make a great hostess gift for Thanksgiving dinner!

Happy sewing!  :-)

Saturday, November 23, 2013

The Ladies Night Sewing Challenge

Hey there friends!

I am really excited to introduce a fun challenge/contest with you today - the Ladies Night Challenge!  And, of course, I hope you'll play along!  :-)

A little background for you ...

A couple of weeks ago, we did some SURMA sewing up at Lee's (May Chappell) house, where Sarah (Stitching and Bacon) started this awesome clam shell quilt.


Fast forward a couple of weeks and Sarah was hanging out with me at Sew Lux HQ and curated this awesome bundle using her clam shell quilt as inspiration as we had all been drooling over it.


So then, on Instagram, Lee, Sarah and I were chatting about the awesomeness of this bundle and what we'd do with it ... and then I kinda double dog dared them ...


So here we are kicking off our challenge and we'd love for you to play along with us!

The Challenge Rules: 

Make a project with one of three Ladies Night Bundles (or use your stash to build your own bundle in one of the three color schemes below).

Link up your project here on our blog by December 23th.  (Linky will be available beginning December 10th.)  *Project must meet the following guidelines:  if you are making a quilt, the top must be complete to link up.  If you are making anything else - tote, pouch, pillow, etc your project should be completed.  No blog?  That is a-ok!  You can link a Flickr image. One link per colorway per person.

We will announce three winners on December 26th.  Prizes will be announced December 10th  on the linky post but will include gift certificates to Sew Lux Fabric, patterns, as well as some handmade goodies and other surprises!  :-)

The Bundles & Color Schemes: 


Volume 1 (curated by Sarah)


Volume 2 (curated by Lee)


Volume 3 (curated by me :-) 

Bundles are available here while supplies last.  Or feel free to curate from your stash in one of these three color ways.  All bundles include the colors shown with a black & white/cream or gray & white/cream low volume base.


Will you sew along with us?!  I sure hope so - this is going to be super fun!  I think I might even start on mine today. :-)

Happy Sewing!  :-)